Friday, March 07, 2014

Kitchen Garden Progress Report. Potatoes. Vegetables. 3.7.14

Potato Well.  Pontiac Red

Potato Well.  White Superior
Today the  temperature was in the mid 50s.  It's still early  to plant potatoes.  I planted some in the "Wells" that I built from tree surround rings.  The wells are dark brick-like material.  They should absorb heat from the sun.  That will warm the soil further.

If a frost is predicted, I can cover the wells to protect the potato plants.

Planted in soil:compost 50:50 mix.

Scallions are growing rapidly.

I planted some additional spinach seeds.

I planted some snow peas in small flower pots.

That's about all.


Thursday, March 06, 2014

Kitchen Garden / Raised Bed Garden. Progress Report. 3.6.14

Chinese Chives, rejuvenation project

Garlic Inchelium Red and others

Cilantro, Yellow Potato Onion, and some iris starts
 Haven't done much, due to illness.  It only takes a small effort to do some things in the yard and garden.

Garlic Chives.  These are the ones I dug out of half-barrel bed in Vancouver and planted in raised bed at Battleground.  I've added a row cover to the bed, although it's off today to let in rain.  Probably due to warming effect of row cover, they are more vigorous than other rows of Chinese chives that I established last year.  Here they have more room, and a real local soil/compost mix instead of potting soil.  I hope they will rejuvenate and provide significantly more vegetable.

Garlic bed.  The Inchelium Red looks like corn.  It's big and vigorous.  The German Porcelain is doing pretty well too.  A few plants did not make it through the winter but most are sturdy and healthy appearing.  The row of unknown is a rescue variety.  The starts were smaller and later, so not a fair comparison.

The overwintering cilantro is growing nicely.  I didn't know until now that cilantro could be fall planted.  Good lesson to learn.  The Yellow Potato Onion is less vigorous this year.  I don't know why.  It seems to be growing now, including bulbs that did not germinate before winter started.


Egyptian Walking Onions
 The Egyptian Walking Onions are growing nicely.  Whatever was eating them seems to be leaving them alone now.  We should  have fresh scallions from these in 2 or 3 weeks.  We could now, if we will settle for small ones.  As apparent in the photo, on the left I replanted bulbs that I kept from full grown plants.  On the right are small topsets.  The bulbs have much larger, sturdier plants.  This difference should mean an extended window for harvesting scallions.

Raining - several inches in past few days.  Having prepared raised beds during the winter, no digging is needed to start some seeds.  I planted a row of cilantro, a row of spinach, and a row of Cincinnati Market Radish, a long carrot-like variety.   The spinach and radishes may need protection from animals.  Cilantro does not need protection.
Seeds Planted 3.6.14,  Radishes, Spinach, Cilantro

Not shown, the low tunnel bed has nice onion starts, about 2 inches tall.  The radishes, turnips, and mesclun are nice little rows, with big cotyledons but no adult leaves yet.  I don't know if the cover is protecting from animals - mice/voles - but so far so good.  Rabbits and deer can't get in, I think.

Peas haven't come up yet.  I will plant some in containers.

Overall I am very pleased.  Even though I don't know what I am doing sometimes, some useful and fun vegetables made it through a winter with historic freezes, and are growing earlier than the soil can be worked for Spring gardening.

Sunday, March 02, 2014

Creating a Bouquet Lilac Bush. 3.2.14

Three of the freshly grafted lilacs.

First steps of Bouguet Lilac.   First graft onto original sucker.
Bouguet Lilac.  Fall of 1st year & Spring of year 2.
 Here is my thought about how to develop a Bouquet lilac.

Step 1.  Spring of year 1.  Graft first new variety onto suckers of a parent lilac bush.  Leave in place at least first Spring and Summer, so the new plant can draw nutrients from the parent bush.

Step 2.  Fall of year 1.  The connecting stolon can be severed and the new little bush planted in a garden bed.

Step 3.  Spring of year 2.  Lilacs have buds in pairs.  Assuming the first 2 pairs of buds made adequate stems, graft new varieties on to each of the new stems.  Graft them above the first 2 pairs of buds, which will be allowed to grow.

If a bud or 2 grew from the rootstock, which itself is a nice lilac, then allow that to grow as well.  At this point, if all grafts take and all varieties grow, there would be 4 varieties.

Step 4.  Spring of year 3.  Additional varieties can be grafted.  I depicted grafts onto the new grafts from Step 3.  It depends on whether the grafts take, and which is the most vigorous. 

I think, if the new shrub produces suckers, those would need to be removed.  If not, the original rootstock variety may take over with more vigor, and overtake the grafted varieties.

I don't know if this will work.  It will be an interesting project to work on.  It takes a certain amount of confidence in the future, to plan a 3-year grafting project.  Then again, so does growing almost any tree or shrub.

This also assumes that my grafts take.  I've read that lilacs can be grafted.  I don't know if my technique will be good enough.
Bouquet Lilac.  Spring of year #3

The big lilac bush is an "OK" variety.  Not very fragrant, and not as lavish as some.  It must be pretty rugged, to have survived here and grown as large as it is.

Saturday, March 01, 2014

Moving established bulb clumps. 3.1.14

Moving established clumps of bulbs.
I dug a few clumps of Hyacinthoides hispanica and a clump of daffodils from the lawn at the Vancouver place and planted at the Battleground place.  They are big enough to readily identify them, and small enough that they are not too floppy to move.  I take a big soil mass so as not to disturb them too much.  I did this last year and the bulbs that I moved grew and bloomed without missing a beat, and are growing again this year.

Transplanted and Established Bulbs
Deer and rabbits eat all of the tulips and all of the muscari.  The seem to leave daffodils alone, for the most part.  They also seem to leave the Hyacinthoides alone.  There might be an animal digging up some of the Hyacinthoides bulbs.  Or a mole that pushed them out of the ground by accident. But most of them seem intact.

Moving big clusters of bulbs, the result looks like they have been growing in place for a while.  Planting individual bulbs in the fall, they look less robust, and take a few years to make nice clumps.

Grafting Apple and Lilacs. 3.1.14

Grafting supplies, rootstock, and scion wood.
 Today I did some more grafting.

First, I identified a sucker growing from below the graft of a dwarf apple tree.  The tree is a nonpatented Jonagold.  The rootstock is nonlabeled.

I carefully removed soil between the sucker and the original tree.  Then I used pruning shears to cut through the sucker base between the stem and the tree, close to the tree.

This rootstock was the result.  The original stem was about 3 feet.  I pruned it back to about 1 foot before cutting for the whip and tongue graft.

This method is much easier for me now.  It just took practice, a very sharp knife, and learning how to brace myself and cut carefully and mindfully to avoid slips and lacerations.


Whip and Tongue Graft.
 This side looks good.  The other side was not as good.  I've done a number of grafts where only one side matched up, and they worked fine.

I make sure to place the prepared scion in water until I've cut the rootstock.  I also get that wet.  My thought is it will slide together better with water as lubricant, and there won't be dry surfaces that might impede joining together.

There was a 2nd stem, a little branch.  I cut that off.   That wound is also covered to avoid dehydration, until healing begins.

Wrapped with polyethylene tape.  The wrap goes from bottom to top with generous overlap each wrap around.  That way rain water drains outside instead of trailing into the wrapping.

I did not cut the top off this time.  I don't know if lower buds are viable.  That might result in the graft not taking. 

Graft wrapped in polyethylene tape.
 The 2nd to last photo shows the well-rooted rootstock.  The cut is large.  I don't think that will matter.  It should heal over.

I potted the new little tree in potting soil, in a one gallon pot.  I plan to return it home, and keep on the deck with TLC care for the first year.

I also grafted lilacs.  At the battleground place is a large, very old lilac bush with many suckers.  I expect the suckers have viable roots.  Instead of removing them from the mother bush, I grafted with them in place.  If they take, I can dig them out in the fall.

Scion wood was obtained from 2 non-suckering varieties at the Vancouver house.  They are un-named varieties.  If the grafts take, there are some choices about what I do with the result.  I could keep them as single-stem tree-like shrubs.   I could plant deeply, so that the scion will form its own roots, then later cut off the original rootstock.
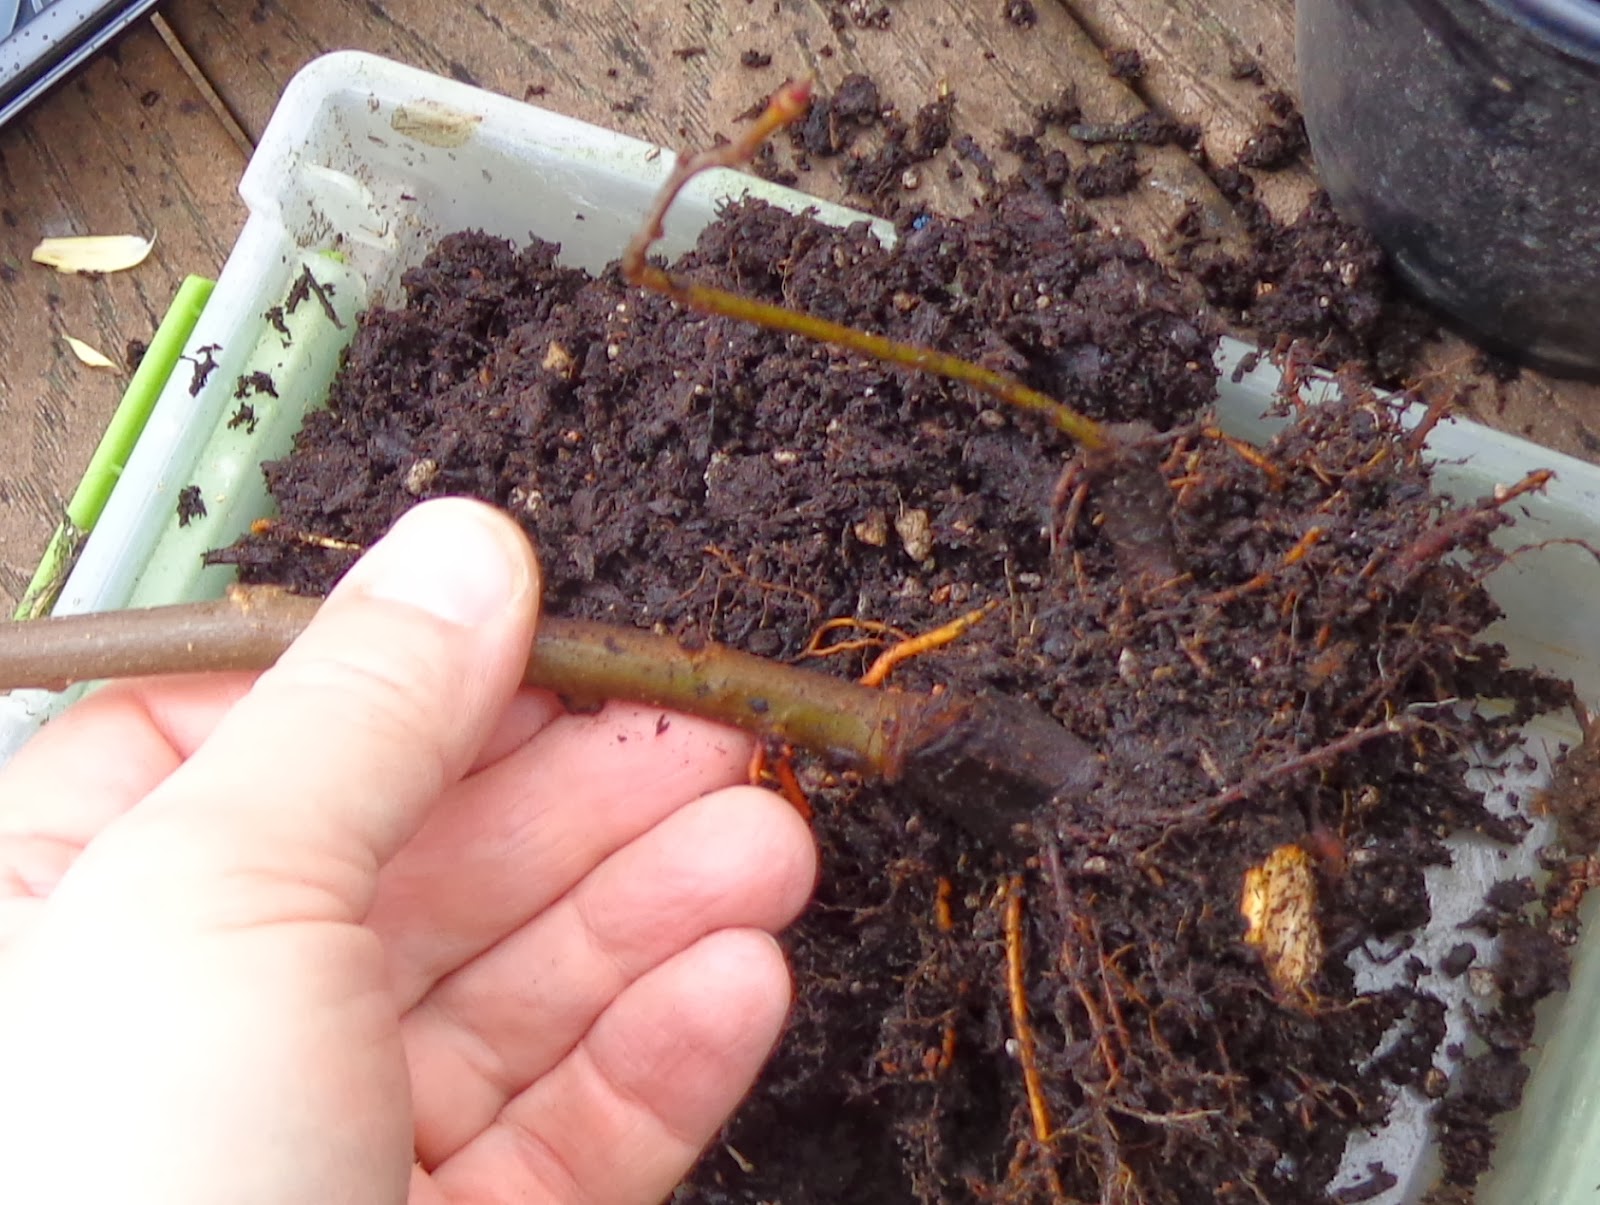
Rootstock with roots.

Completed graft.
I could consider these a multi-year project.  The first year, allow 2 stems to grow from scion.  The 2nd year, graft again, leaving one or two nodes to grow out below the 2nd level of scion.  At that point, it could be a 3-variety shrub.  Repeating a 3rd year, could make for a multi-variety shrub with 6 or more varieties.  Sort of a bouquet tree.  That will be interesting.  The first step is see if the first grafts take.

The lilacs clearly have viable buds low on the scion, so I did cut them back to one node, containing 2 buds.  Then sealed the cut tips with tree-kote.