Saturday, October 28, 2006

Still getting figs. Tomatoes are winding down.


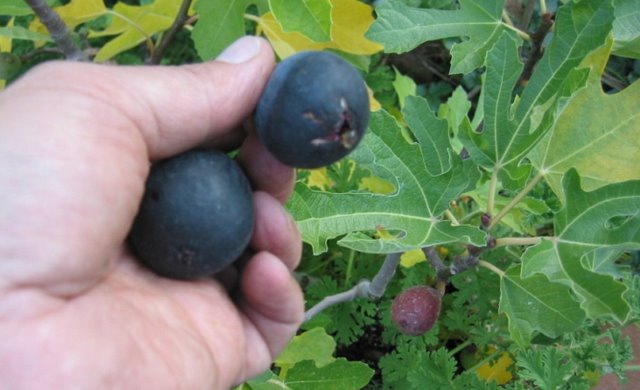
Still quite a few figs remaining on petite negri. Best results so far on this 5 year old tree. This late, main, crop tastes very good - equal or better than the breba crop. The secret seems to be letting them get so ripe that they almost fall off on their own. I need to remember tanglefoot to keep the ants off (or are the ants acting as pollinators?).

This year's fig results:
Petite negri: It was worth the wait. Still about 2 dozen on the tree. About 4 dozen figs this year. Tree is 5 years old from purchased, mail order 'stick' size tree.
Vancouver: The last fig was yesterday. About 3 dozen this year. Tree is 3 years old from cutting.
Petite negri in pot: about 3 years old. first small figs this week.
Hardy Chicago: vigorous. The first fig (this curring is less than one year old) was good, although I understand that following years will be better.
Melanzana: The first fig wasnt ripe yet when I cut it. Bummer.


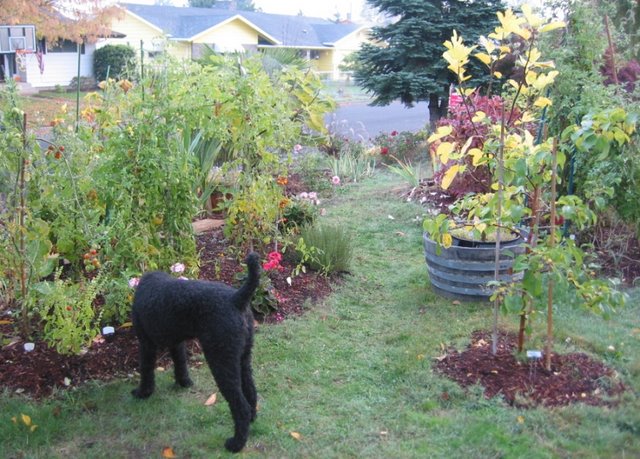
The tomatoes are winding down. Still some coming ripe in front yard patch.

The back yard patch didnt do as well this year. I suspect the shade from the grapes, which had their best year ever
Posted by Picasa

Sunday, October 22, 2006

Sunday: Puttering, homework. Bike tomorrow?


Collected some geranium cuttings - the unusual types. No loss if they don't survive the winter. However, this way I have a back-up in case the larger, dry-stored plants dont make it. The advantage of the dry storage method is that the plants will be larger in the Spring. Also, they don't need much attention in storage.

These include some scented and some variegated leaf varieties. No rooting hormone was used - just cut to size, trim extra leaves, stick them into some general purpose potting soil. Last year most of the cuttings took using this method.

Some petite negri (potted tree). First crop for this potted tree. One shows the tear of the penitent.

Also collected some ginkgo seeds and cleaned them up. I'll use the "squirrel method" this time - pleant them around the yard and forget about them. Some might surprize me with little trees next summer.

Better go inflate the tires for tomorrow's ride. Posted by Picasa

Friday, October 20, 2006

Some tile choices (of many)


Posted by Picasa

Bathroom Remodel, what it took to get started

The initial plan was to start Nov 2005 with nhopes to finish by Christmas. A trip to Home Depot and their designer resulted in a plan and a visit from a general contractor, but the contractor was unable to give an estimate, despite several calls, until we gave up in January. I suspect that there are so many big projects (housing boom) that no one is willing to take on a small project like a bathroom.

A contractor was identified via a co-worker; he stated that a designer was needed. A designed was also identified via a coworker - $$$ later, the estimate came through at $45,000 for the 2 bathrooms. After I picked up my jaw from the floor, it was time to read and learn to do it myself. (Wild guess, I'm thinking $2,500 for the guest bath, maybe $4,000 for the master bath).

There are lots of books available. Everything was measured at least twice. Plans were drawn up from the original bathroom. Using the bathroom remodel book, plans were drawn to scale of the new bathrooms.

We decided to do one at a time, so that we would have at least one working bathroom through the entire project.

I found the city web site, took the plans there, and got a permit. Not as bad as I thought. We are still looking for electrical and plumbing contractors, but that doesnt look too difficult either.

The project, very roughly, looks like this:

1. The guest bathroom will be de-constructed down to the studs and tub.
2. Then the new wall will be framed in.
3. Wiring and plumbing will be placed for the new fixtures. This part will require electrician and plumber (Thanks for angieslist.com).
4. City inspection.
5. New walls, ceiling to be installed.
6. Tile the walls.
7. Install fixtures.
8. Tile the floor.

There are probably a couple of other inspections involved, but that is the rough plan for the project.

The plans are hard to read here - I need to learn how to scan documents. Another day.


Existing bathrooms.


New floor plan

Layout for East wall and fixtures, Guest Bathroom.

Posted by Picasa

Bathroom Remodel

It has nothing to do with gardening, or bike, or "green living" (or at least, not much), but it IS what's going on at this house right now, so here it is in my blog.

This house needs a new bathroom arrangement. The old master bath and guest bath are back-to-back. Both are small. The long term goal is to make the master bath larger by stealing some dead space from the guest bath, and to open up the guest bath by removing a separating wall & door between the toilet and sink.

A separate entry will describe the prosess up to now.

What is wrong with the old guest bath?
- Wall separating toilet/tub from sink; makes both spaces cramped and closet-like in feel. It leaves no natural light to counter and sink area.
- No fan, which leaves the room damp when used for the shower; the toilet area is aired out only if the window is open. "fumes" can be noted in the main hallway.
- Odd shaped counter, taking space without providing much useful function.
- Drawers bang into each other when opened.
- The current drop-in sink on counter with small tiles (so lots of grout) is a hassle to clean. Too many nooks an crannies for dirt and mildew.
- The toilet is damaged.

Goals for improved guest bath:
- Despite loss of some floor space, the room will seem larger and brighter after the dividing wall is removed.
- There will be a fan.
- Current plan is for a porcelain pedestal sink, avoiding the nooks and crannies in the current version.
- New toilet, hoepfully a high-functioning water saving model.

Photos below show the physical work to date, including original layout (so small I was unable to take photos showing the toilet/tub area), and the counter, sink, and diviging wall going / going / gone.


Original Counter and Sink. Toilet / tub area is too small to take a photo showing the area. The toliet is on the other side of the wall, behind the sink and mirror in this photo.

Going

Going

Sink, counter, doorway, and wall are gone. Still a lot of deconstruction remaining, however. Wow- it's much brighter now.
Posted by Picasa