Showing posts with label bathroom project. Show all posts

Sunday, September 16, 2007

Bathroom Project

Posted by PicasaAnother step closer. Hired a plumber to finish the fixtures. First he spent a lot of time saying that the plumber who roughed in the pipes did it all wrong. Then he said that the new Toto water saving toilet could not be installed on the original drain pipe and that the tile coult not be drilled. So I did it yesterday, he was wrong on both counts and now we have a new water saving toilet. Then he only managed to get the sink 1/2 done, so I wound up finishing that. Apparently the original plumber installed the wrong pipe for the bath tub spout - a part will be sent in the mail to replace that, and I hope that it will work.
Still major progress in the right direction, with a working sink and toilet, ,and a tub that is 'almost there'.
Now to spackle over the cement board above the tub, then prime and paint.

Sunday, August 26, 2007

Bathroom Project

A few rows remaining for the Subway tile, and a couple of details, then the tile work is done. The color in the top photo is the closest to reality. That 'couple of details' - such as the window, will take a lot of tile cutting, so not quite done, but there is a light at the end of the tunnel. No grout on these wall yet, obviously, since the tile work isn't finished.
The sink and shower wall is getting grouted first so that I can have the plumbers come in and hook up the faucets. The other walls can be done afterwards. I will feel muich better when the sink is installed.

Initially, I thought the tile was too uneven, both the tiles and my application, but with the grout in place I'm feeling better about it. These tiles are supposed to have a 'hand made' look, so are have uneven and wavy edges, which makes them difficult to line up. The nice part is that the final product LOOKS hand made, and the play of color variation in the tiled wall makes it more interesting compared to 'perfect' tiles.

Posted by Picasa

Friday, July 06, 2007

Bathroom Project. Month # 8

Of course, it shouldn't take 8 months to redo a bathroom, but I can only work on it about 1 or 2 days per month. Since the last blog entry on this project:

1. Floor is replaced with 3/4 inch outdoor grade plywood. On top of the plywood I laminated a 4-ml polyethylene barrier. Then 1/4 inch cement backer-board, thin-set and screwed into place with backerboard screws. It is ready to tile.

2. Walls are reframed. About 1/2 of the framing was recycled. The new drywall is mold resistant paperless drywall. Bathtub surround is 1/2" backer board. Insulation in the ceiling was changed from 3" to 7". New exhaust fan is installed.

Today I sanded the walls and ceiling, and painted with primer.


Posted by Picasa

Saturday, November 18, 2006

Bathroom


I would take a long soak in the tub except for one small problem....

About 1/2 of the wall is down to studs. The floor layers are all off except the last layer of particle board.

Most of the framing is gone from the dividing wall. Once the remaining drywall is off, and the particle board is off the floor, I can start framing. Posted by Picasa

Friday, October 20, 2006

Some tile choices (of many)


Posted by Picasa

Bathroom Remodel, what it took to get started

The initial plan was to start Nov 2005 with nhopes to finish by Christmas. A trip to Home Depot and their designer resulted in a plan and a visit from a general contractor, but the contractor was unable to give an estimate, despite several calls, until we gave up in January. I suspect that there are so many big projects (housing boom) that no one is willing to take on a small project like a bathroom.

A contractor was identified via a co-worker; he stated that a designer was needed. A designed was also identified via a coworker - $$$ later, the estimate came through at $45,000 for the 2 bathrooms. After I picked up my jaw from the floor, it was time to read and learn to do it myself. (Wild guess, I'm thinking $2,500 for the guest bath, maybe $4,000 for the master bath).

There are lots of books available. Everything was measured at least twice. Plans were drawn up from the original bathroom. Using the bathroom remodel book, plans were drawn to scale of the new bathrooms.

We decided to do one at a time, so that we would have at least one working bathroom through the entire project.

I found the city web site, took the plans there, and got a permit. Not as bad as I thought. We are still looking for electrical and plumbing contractors, but that doesnt look too difficult either.

The project, very roughly, looks like this:

1. The guest bathroom will be de-constructed down to the studs and tub.
2. Then the new wall will be framed in.
3. Wiring and plumbing will be placed for the new fixtures. This part will require electrician and plumber (Thanks for angieslist.com).
4. City inspection.
5. New walls, ceiling to be installed.
6. Tile the walls.
7. Install fixtures.
8. Tile the floor.

There are probably a couple of other inspections involved, but that is the rough plan for the project.

The plans are hard to read here - I need to learn how to scan documents. Another day.


Existing bathrooms.


New floor plan

Layout for East wall and fixtures, Guest Bathroom.

Posted by Picasa

Bathroom Remodel

It has nothing to do with gardening, or bike, or "green living" (or at least, not much), but it IS what's going on at this house right now, so here it is in my blog.

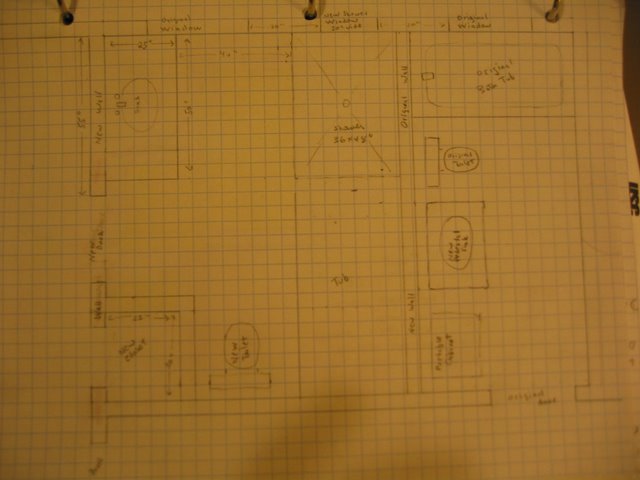
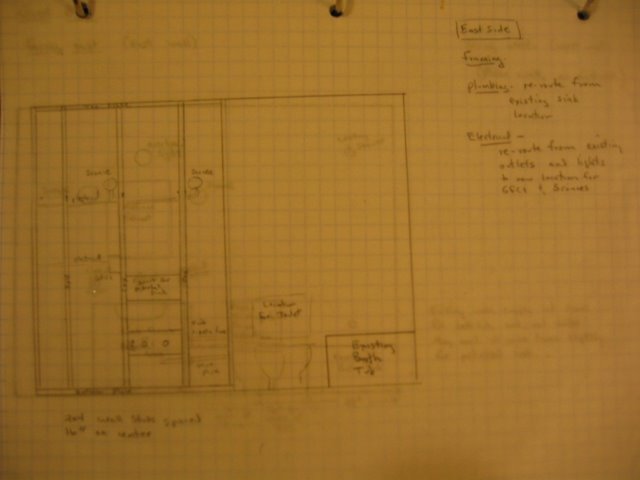
This house needs a new bathroom arrangement. The old master bath and guest bath are back-to-back. Both are small. The long term goal is to make the master bath larger by stealing some dead space from the guest bath, and to open up the guest bath by removing a separating wall & door between the toilet and sink.

A separate entry will describe the prosess up to now.

What is wrong with the old guest bath?
- Wall separating toilet/tub from sink; makes both spaces cramped and closet-like in feel. It leaves no natural light to counter and sink area.
- No fan, which leaves the room damp when used for the shower; the toilet area is aired out only if the window is open. "fumes" can be noted in the main hallway.
- Odd shaped counter, taking space without providing much useful function.
- Drawers bang into each other when opened.
- The current drop-in sink on counter with small tiles (so lots of grout) is a hassle to clean. Too many nooks an crannies for dirt and mildew.
- The toilet is damaged.

Goals for improved guest bath:
- Despite loss of some floor space, the room will seem larger and brighter after the dividing wall is removed.
- There will be a fan.
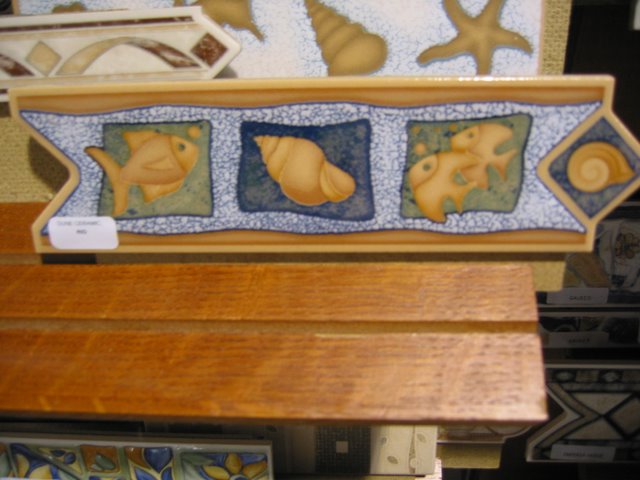
- Current plan is for a porcelain pedestal sink, avoiding the nooks and crannies in the current version.
- New toilet, hoepfully a high-functioning water saving model.

Photos below show the physical work to date, including original layout (so small I was unable to take photos showing the toilet/tub area), and the counter, sink, and diviging wall going / going / gone.


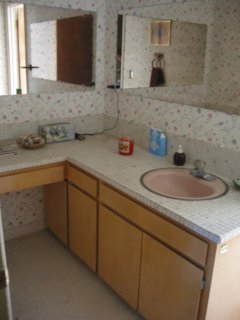
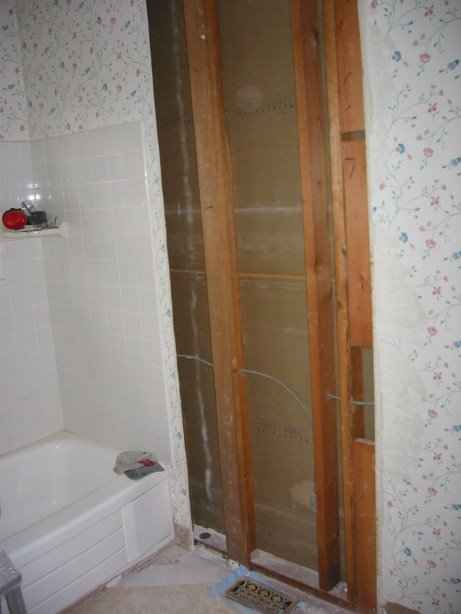
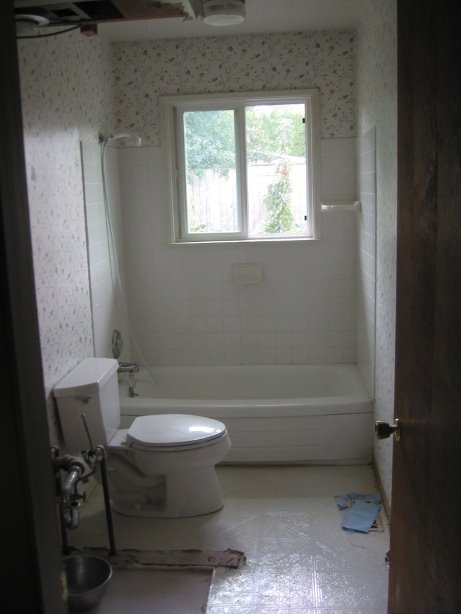
Original Counter and Sink. Toilet / tub area is too small to take a photo showing the area. The toliet is on the other side of the wall, behind the sink and mirror in this photo.
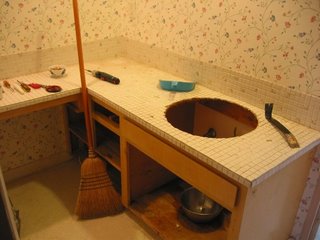
Going

Going

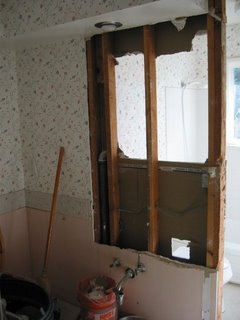
Sink, counter, doorway, and wall are gone. Still a lot of deconstruction remaining, however. Wow- it's much brighter now.
Posted by Picasa