Still struggling with computer programs. The editor that I bought seems to automatically remove pixels, and the photos are less crisp. My review at the momenr of "Phot Explosion" is that it sucks. So, I downloaded Picasa, which is easier to use, and free, but removed all of my cropping. I also worry that, being from google, it might upload onto the internet without my knowing, or collect information. Plus, this program now unedits some of my edits. Damn programmers..... but here we are.

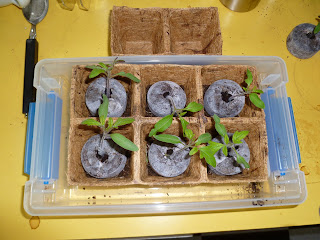
Here are the tomato seedlings in their original "pellets". The pellets are coconut-based fiber, much mroe environmentally friendly than peat. They worked really well. The seedlings are 2 weeks from bare seed. Amazingly fast. It's still not too late to start tomato seeds here - about 6 weeks from time to plant outside. I may start some peppers now. They go in even later. These were all old tomato seeds, up to 6 years old. They all sprouted. Roots are sticking out of the sides, as long as an inch outside the pellets. Time to replant them.

This is the coconut-fiber based product I'm using for plantable containers.
I've placed a couple of spoon-fulls of organic potting soil into the containers, then added the tomato seedlings, still in their pellets.

I've added more organic potting soil to fill in around the pellets, then covered them as well, then watered them in. Here is the lighting setup that I'll use for a few weeks. It doesn't seem as bright as last year. Maybe the bulbs need time to warm up. Or need replacing. They are 20-watt bulbs. Gardening blooks usually call for 40-watt, but these are half as long, so half the wattage.

I added some foil to reflect light back onto the seedlings. The plnats are only a few inches from the bulbs. The short distance maximizes the impact of the lights. They are cool bulbs, so no concern about burning. They do warm the air a little, which is beneficial. Overall I'm pleased with the seedlings. I did not order new seeds at all this year. Except the coconut-fiber pellets and pots, I did not buy new supplies. The plastic contaners are old. I may size them up one more time, this time into plastic pots, when they outgrow the current containers. The seedlings are all varieties that I like:
Lemon Boy (favorite #1),
Better Boy (favorite #2),
Cherokee Purple (favorite #2),
Black Krim (favorite #3),
Supersweet 100 (favorite #4),
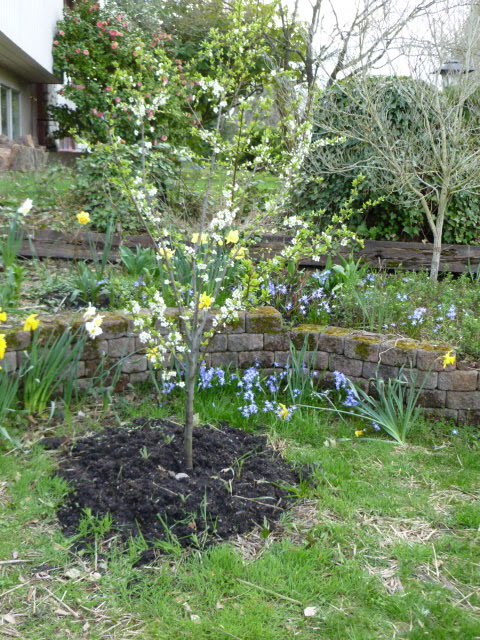
4th of July (second chance at becoming a favorite, pretty good last year and produced before the others). I have 3 plants of each variety, so 15 plants total. They will go into 3 beds of 5 each, more or less. Last year was a bad tomato year, partly climate and partly I was overworked and could not tend them. This year is already starting out better.
 These are SuperSweet 100, in a south window, with a fluorescent desk lamp for supplemental light. They are more compact and look sturdier than the other plants. That might be due to the lamp, the South window setting (rain rain rain clouds clouds clouds) or the variety. The little seedlings stretching toward the light are the many year old.pepper seeds, I planted thinking they would not germinate. I need to juggle plants around so they get more light.
  These are all of the others. Taller, a little floppy, but OK. I think I'll replant them today.
  The roots grow very easily through the coconut coir pots. It's almost like there is nothing there. I've always thought that pressed peat pots were not so root friendly, so did not use plantable pots. The coir pots have changed my mind. Even so, the tomatoes need to be up-potted, so this time I'll use the plastic pots. I'm concerned that roots will dry out when sticking out, and the coir pots become soft and might break easily when wet, especially with the larger size / heavier soil.
  I up-potted the SuperSweet 100 seedlings into plastic pots. Also one of the slicing tomatoes. It's only 48 outside now. Against the house, I think it's warmer, and not in the rain. I'm setting them outside in a sheltered, south-facing spot. This will start the hardening off process. I will bring them inside at night. Now in the "sun" (if you can call it that, rain rain rain) the differences are more apparent. Supersweet 100 from the South window, desk-lamp are stout, dark green, compact plants. Slicing tomato from east, grow-lamp are lankier, lighter green, a little floppy. Not scientific at all. I think the difference is the laps, with the desk lamp being much brighter.


 Lemon Balm. The yard was full of them 9 years ago when I bought this house. I made the mistake of leaving a few plants. Unfortunately, they grew and spread new plants all over the yard. This year, I am using Worry Free, an organic weed killer. Has a nice citrus scent. Every time I see a Lemon Balm plant, I spray again. They are dying off. I will continue to seek and destroy them. By summer, there will be no more.