Wednesday, September 23, 2020

New Raised Bed. 9.23.2020

 This is the first of three new raised beds that I have planned.  The old ones are in a location where I want to plant miniature fruit trees.  They are eight years old, and the untreated fir wood is rotting, especially the lower planks.  

This is part of my effort to build some gardening infrastructure for the future.  These beds are three planks tall - about 18 inches.  This height will be easier to garden as I age.  I will have the beds far enough apart, that I can have a walking assist device or bench between the beds.  Around the beds, I will have tree chip mulch.  The construction is surprisingly easy.  The corners are pre-cast concrete blocks with slots in the sides and a hole through the top.  The hole accommodates a rebar, which is pounded into the ground to hold them in place a little better.  The slots are made to fit a 2 x 8 plank.  I bought 8 foot long planks, the length of the bed.  For the width, I cut them in half, for 4 feet.  I bought treated lumber, and will line with plastic.

After leveling the ground, I lined three sides with plastic, and removed one end to roll the wheel barrow into the bed to dump garden soil.  When I get near completion, I will replace those planks and line the end with plastic before filling the end.

 The bottom is lined with a re-used layer of hardware cloth.  That wasn't big enough, so I added re-used chicken wire to make up the difference.  I folded the chicken wire to double it.  The purpose is to prevent tunneling animals from working their way up into the bed.


End removed to allow me to fill using a wheel barrow.  When I'm ready, I can just slide the boards back into the slots.

I wanted to re-use soil from previous raised bed.  That soil has received a lot of compost and some minerals over the years.  The dimension is also nominally 4 feet by 8 feet.  However, the concrete corner blocks actually increase the dimension.  Instead of losing 2 inches each war from butting the corners together, there is about a 2 inch gap in the block, so 4 inches are gained at each corner.  In addition, those old beds  had sunk into the soil over time, so the height isn't as much.  I bought a truckload of top soil. Combining the 1/2 yard of purchased topsoil with the existing soil from one bed, might fill that bed. 

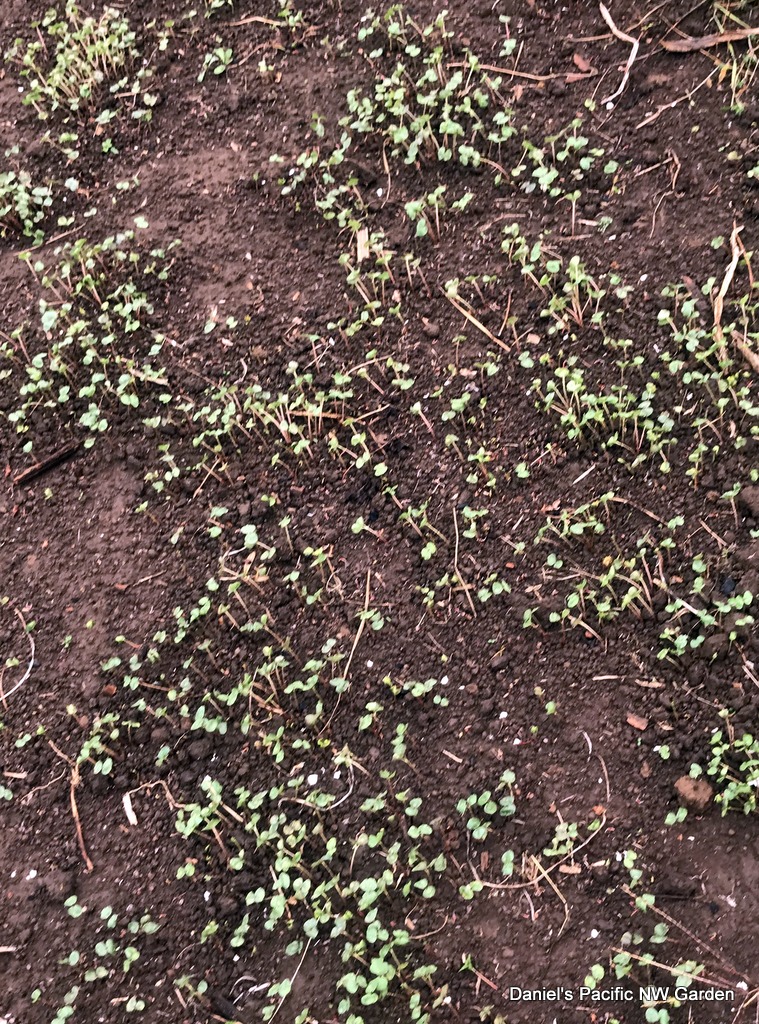
When this is done, I'll plant garlic in this raised bed.  It's the only one that I am really motivated to complete before winter starts.  The others can be done during the winter.  My plan is, one for garlic, one for cucumbers, one for peppers.  There will be room for some other plants.  These are the main ones that benefit from raised beds in my garden.


Saturday, September 19, 2020

Redlove Era Apple. 9.19.2020

Today I harvested the first Redlove Era apple, and also a Redlove Calypso and a bunch of others.  This was the first apple from Era, which is in it's second summer now.  The Redlove Calypso has been in the ground less than a year.  It had three apples, and I ate one a month ago.

I forgot to upload a photo of the uncut apples.  I will do so if I can locate it.

For comparison, here are Airlie Red Flesh, Redlove Calypso, Liberty, and Redlove Era.  Liberty is a medium size apple, Airlie Red Flesh is small-ish.  The Calypso and Era apples were small, silver dollar size apples.


Era is much deeper red.  The skin is also more red, compared to Calypso.  Airlie usually has more red or pink compared to this apple.

The Airlie and Liberty were both sweet, apple-flavored apples with almost no sourness.  Calypso was very tart, and not much else.  Redlove Era was really delightful , a fruit or berry flavored apple, tart and sweet, sort of like cranapple.  

Fruit trees usually need a few years for their fruits to reach full size and flavor.  
it's nice to get this taste.  So far, my favorite is Redlove Era.

Slices from Redlove Era apple.  Very tasty.  The photo doesn't quite catch the true red color - a dark scarlet.


Corn (Maize). From Seikei Zusetsu, Japan, 1804

 Seikei Zusetsu is a book containing agricultural woodcuts from early 1804 and created in Japan in 1793 by unknown artists in Japan.  This image is from wikimedia commons.  I edited this image slightly, cropping for a narrower page border to emphasize the image better.  I find these images very compelling, combining some things I love to look at - Japanese art, 19th century book engravings (technically these were end of 18th century), botanical art, and history of agriculture and horticulture.  This is an image of corn, a crop originally developed in Mesoamerica (I guess millennia before Maya, let alone Aztec empires),  and spread around the rest of the world as part of the post-Columbian exchange.   I chose this image because now is corn harvesting time.


Friday, September 18, 2020

Bee forage, or not. 9.18.2020

 The wildfire smoke level is down to about 100, from well above 500 two days ago.  That's still not "clean" but not "hazardous to life" that it was.

I checked on the bees, through the window in their beehive.  I THINK they are OK.  Not much activity, today was cook and rainy so I think they wouldn't be going out anyway.  The yellow jacket traps have a few dozen yellow jackets - bad news, really. That means there are still lots of them out there.

Since it's cool and there are no bees out there, it may not matter now to have nectar and pollen plants.  But there might be sunny days now and then.

This is the patch of wildflowers that I planted in July, I think.  It was after the irises that were in this spot finished blooming, and I moved them elsewhere.  They are blooming nicely now.  I was surprised that they did this well, planting the seeds so late and watering only a few times when first planted, and a few times this month.  I don't know the source of the wildflower mix.  There are lots of bachelor's buttons, some coreopsis, cosmos, and a few zinnias.  That is most of it.  Deer have not eaten any of it.


These are the buckwheat that I planted in the former potato patch, roughly two weeks ago.  I think they benefited from the smoke emergency, because the soil did not dry out so fast.  I don't know if these will just be a ground cover / "green manure" cover crop, or if they will bloom before the first frost.

These are the other buckwheat, planted in mid summer.  They are blooming very well.  It's not a big enough patch to sustain a hive, but it's not nothing.  This is a learning process for me.


Phacelia is not blooming yet.  I think it might be close.

Squash Harvest. 9.18.2020

 I decided to harvest all of the squashes today.  The stems were dry and woody, so that tells me it's time.   This was a nice harvest, and some are new types that I never grew before. I regret a little bit not isolating the blossoms and hand pollinating each with its own variety, but at the time that wasn't an option.  I also did not realize how much I wanted to save seeds this year.

There are some new types - the Red Kuri Japanese squash produced quite a number of small, acorn-squash or larger size squashes.  The Japanese Kobucha squash, on the other hand, made only one.   The Pink Banana Squash made two very large and several small to large squashes, but one large one was vole-chewed and developed rot as a result.  No waste - that went to chickens who will eat the squash and its seeds.  That's OK, I got mine too.  Then my other favorite is the Galeux d'Eysines pumpkin (Apparently "Galeux" means scruffy or scabious) - beautiful pumpkin and makes really good pies.  So does Pink Banana Squash, which is special because my great aunt Emma gave me seeds to this one 55 years ago, I grew them and my mom used them to make pies.  These seeds were from Baker Creek heirloom seeds.  

 There are also some summer squashes, which will be used in a couple of weeks, and the two big stripy  / green  ones are heirloom Italian Zucchinis that I am saving for seeds.  I hope the progeny are not a tasteless mix, so next Spring I'll grow one from the old packet as well.  The big white one is "Illinois Squash" which I've never eaten and which I don't know what it will be like.

Those yellow summer squash are incredible good prepared as follows.  Slice into French Fry shape slices.  Don't try to skin them first, the skin is tender and cooks even more tender.  Dust the slices with season salt, pepper, garlic powder, maybe some pepper flakes.  Drizzle with vegetable or olive oil, stir, then air fry 400 F, 8 minutes, toss, air fry for another 8 minutes.  The best breakfast or snack you can have. 

 You can also do that with Zucchinis.


Sweetcorn Harvest and Freezing. 9.18.2020

 Sweetcorn has been coming "on line" for the past week.  There were a few ears from the first planted batch, the second planted batch basically didn't grow or the plants got eaten by something.  So these are the third and fourth batches, which were planted early / mid June I think, and I wondered if that was too late. As it turned out, they are producing a lot of big tasty perfect ears.

This also answered a couple of questions I had.  One, there wasn't enough room to plant four-row blocs, which was recommended for best pollination.  Instead, I planted three-row blocs.  Those have done fine pollination-wise.  Maybe a few small ears, but not a problem.  I also wondered if they were planted too late.  This makes for a fall crop, but did much better than the earliest ones.  Which where OK and better than nothing when I got some sweet corn from those.  

There were a lot of tomatoes to pick at the same time as the sweetcorn.

I think these were "Ambrosia" but they might be "Bodaceous".  I like the "SE" type corn.  The supersweets are too sweet and not enough corn flavor.  The SE type ripens for me, is sweet but not sugary sweet, and has a good flavor, tender but not mushy kernels.

I blanch for three minutes in boiling water, transfer to ice water, and when cool, slice off "planks" of corn.  They don't make planks if sliced when hot, which is interesting.  I like those.  This is different from fresh, but such good flavor and so welcome in midwinter, that I grew extra this year just to freeze.  The last bloc is also almost ready to harvest.

Saving Seeds. 9.18.2020

 From late summer, about mid August, until now, I've been collecting seed heads and seed pods etc. to save for next year.  Part of that will be for wildflower meadow, and part for vegetables or other flowers.

I saved flower and chive seeds buy cutting the seed pods or tops off, and putting them into brown paper bags, upside down, so the fried seeds would fall into the bag.   Others, such as cucumbers, I let the pulp ferment in water for 2 days, then let them dry on newspaper, the same as is done for tomato seeds.

These were the "bush" pickle cucumber seeds.  I was hospitalized when they were at their peak, so no pickles this year.  I let some of the fruits fully ripen to a tan/yellow color, with a husk that seemed a bit papery.  Then I cut three open, scooped out the seeds, let them ferment, and dried for a week on newspaper.   I thought they would stick together, but they did not.  This is enough to start a pickle farm.  Now they are in a paper envelope for the winter.

These were Oregon Sugar snow peas.  The holes indicate that a weevil has tunneled into them and hollowed them out.  So these are not viable.  I wasn't as crazy about Oregon Sugar as I was about Taiwan Sugar anyway.  Oregon Spring grew too tall, produced too late, and the snow-peas were not as good as Taiwan Sugar.  A similar thing happened to Taiwan Sugar but not as many.  I put them into a jar in the freezer, which is meant to kill the weevil.  If I can find them again.

Shirley Poppy seeds.  For these, I just cut off the pods when the stems turned brown.  After they are fully dried out, shake out the seeds like a pepper shaker.

Four O'clock seeds.  I saved, separately, red, yellow, and pink flowered types.  They come up volunteer anyway, but I thought I might add them to the fig tree area.

Marigold seeds.  These are messy.  I didn't realize that it's easy to pinch the pod, pull off the dry petals, then tear open the pod to release the seeds.  So these are seeds mixed with petals.  They have a nice herbal - floral scent.  I think the petals are OK.  There are enough seeds here to start a marigold ranch.  They will go into the wildflower meadow.  This is a yellow French variety that the honeybees liked.

When the seeds are dry, I transfer them into paper envelopes.  I'm not getting outtoo stores because of the coronavirus and stupid, stubborn people out there who want to be modern typhoid Marys, so these are home made using a paper tablet and painters tape.  They are just as good and basically free.  I use paper because it dries out, while plastic retains moisture that can cause mold..


Tuesday, September 15, 2020

Cherry Pie. 9.15.2020

 In July, we picked about 6 pounds of pie cherries from the backyard orchard.  I made batches of pie filling, which I froze in zipper lock freezer bags.  Yesterday I thawed out a package and made a pie.  The crust is a standard Butter Flavor Crisco based crust.  Can't beat the flakiness and flavor, although I should probably try oil crust again.


Quilting Project. 9.15.2020

With unrelenting, health-threatening, wildfire smoke filling the air, the advisories are to stay indoors with air filters running and a/c on.   The coolness actually kept the garden from drying out, so I have not had to water.  Will wear a filtration mask today and check.  

Meanwhile, I worked on the quilt project that I posted 9.6.2020.  The first steps are in that post.  The method and overall pattern are from Ruby Star Society.  My take on that is using batik strips that I bought via Amazon, one roll of muted blues and sandy colors, and one of rainbow colors.  For some panels, I arranged the rainbow colors based on the pride and inclusion flag.   For other panels, and mixed them with the sandy beach colors, and for some panels, it was all the seashore blue and sandy tan colors.  I also added a strip from left over batik fabric I bought to make an Aloha shirt, which I also used for making a mask.  That way, more of a part of my life now, is in this quilt top.

I will need to edit this post later.  The blogger platform isn't designed to do on I-pad / Firefox browser, what I want to do.  (Edited 9.15.2020.  The lap top works better than I-pad, although it's still not a perfect process.  That may be because I use Firefox browser.)

After deciding which colors went where (and arranging and rearranging, and then arranging and rearranging), I sewed them into panels.  I sewed the strips into pairs, then sewed the pairs together, until each panel consisted of 10 strips.

Then I ironed the seams flat, toward the darker patterned fabric side.  Then I evened up the squares, and trimmed to make as perfect square as possible.  Mine were all 18 3/4 inches on each side.  I also measured distance between opposite corners to make sure those were all equal.  I think in the linked instruction, they are 20 inches on a side, but mine came to 18 3/4.  That may be due to different size of fabric strips.  

Here they are, all ironed and trimmed.  I think the quilt starts to feel like it will really happen, now.

Then I paired up the squares in combinations that I liked, with no two pairs alike.  That some thought and arranging and rearranging and more thought and more arranging and more rearranging.  In each set of squares, one panel is at 90 degree angle to the other.  That arrangement is necessary for the final flying kite or butterfly appearance of this quilt pattern.

 
Then I clipped the edges together and sewed a new seam, all the way around.  Here is one with the clips.  I needed some very small adjustments, because even with my best effort and multiple measuring, a few did not come out perfect.  This one shows a panel that I made with all of the colors of the pride and inclusion flag, although the colors are in a different order.
 

After sewing the squares together, there are four sewn panel sets.  Then, after more measuring, I cut the sewn squares corner to corner.  These triangles open to form new squares.

I opened up the cuts, which are now squares with stripes in two directions.  Then I ironed the seams flat.  Each square panel is different from the others, because the patterns self-assemble somewhat into new arrangements.

Now I arranged them, and rearranged them, then went away, then returned and rearranged so more, to come up with an arrangement that I liked.  I had to use the bed because I don't have a table this large. Each row has at least one rainbow, as does each column.  I tried not to have the same pattern or color combination in one panel adjacent to the same pattern in the adjacent panel, although that is difficult to accomplish.  The result is a pattern that looks "random" but actually is very much intentional and planned.  I think more rainbow would have been too much, and less would have been not enough.  So I think equal parts rainbow colors and blues/tans works pretty well.

Next, I will sew these panels together to make the quilt top.  I think it will need a batik border too, primarily grey or tan, and a mostly black binding.


Saturday, September 12, 2020

New Face Masks. 9.12.2020

 I still use the home made, pleated masks that I have been making.  They are not a perfect fit on the sides.  Also, the sewing machine has some challenges with the multiple layers of the folded pleats, and sometimes skips stitches.  It probably doesn't help that I added a light, nonwoven interfacing as a liner, and the inside fabric is cotton kitchen towel, which some studies showed to be very good as a viral filter.

This pattern is quite different.  The fit is much better.  I made one that had ripstop pants fabric as the outer layer. The mask looked great, very professional, but it wasn't breathable, which is a problem.   I made these new masks with batik cotton quilting fabric outer layer, light interfacing liner, and kitchen towel inner layer.  This filters smoke very well, and is breathable but probably the upper limit to how thick I can breath through comfortably.  This makes a good mask for both wildfire apocalypse and coronavirus apocalypse.  I'm not sure about plagues of locusts, frogs, or zombies. 

I'm having a difficult time loading photos.  I'm using Ipad.  If they don't work out, I'll need to edit later. (Edited 9.15.2020)

The materials - this was some batik fabric that I bought to make a shirt.  There was some extra.  The NY Times article that I read stated that cotton batik fabric is the best, along with "tea towel" which is kitchen towel.  Later articles state a nonwoven filler is helpful, so I added a nonwoven interfacing.

I cut to the downloaded pattern from the link above.  I ironed the interfacing onto the inside aspect of the batik fabric, before cutting.

I followed the article instructions, pretty much to a T.  It was very straight-forward.  I used two food bag twist ties to make the metal nose strip, which is sewn inside the mask before final assembly.  I also used polyester shoestring for ties, cutting to fit and sealing the cut ends with a butane lighter, so they don't fray.

This mask has an excellent fit.  It seals much better at the sides, compared to the pleated masks that I was making.  Those mask pleats were also difficult to sew, whereas this mask doesn't have pleats, so no problem.

The inside of the mask, showing the tea towel fabric.  That is quite comfortable.  I think these masks filter out a lot of the smoke particles in the current Pacific NW worst-air-quality-in-the-world situation due to wildfires.  I feel much less short of breath and lung tightness when wearing this mask outside, compared to not wearing it.