
Saturday, July 14, 2012
Making Hybrid Iris, Iris update
An update on the seed pods. They continue to swell. Now the color is becoming more pale, starting to brown. I take that as a sign if imminent maturity.
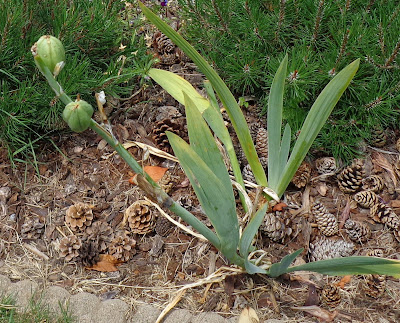 I walk past this every day. I water it occasionally so that it won't dry out. The original rhizomes are growing a bit as well. The pine cones are an impromptu mulch additive. I collect them when walking the dogs and throw them around on the mulch. They add interest, and eventually break down like the rest of the bark chips. They dont seem to cause a problem to the irises.
 The edging rings are working well for keeping weeds out. I still go in and groom the soil a bit. I pull weeds as soon as they are visible. Irises that I have not dug up and transferred to the new little beds are more weedy. This is easier to maintain. Since I've watered these to get them established, they are growing more leaves. I may stop watering them next month, so they can harden off for winter. Some of these are miniatures that I rescued from a bed so covered with grass the plants were not visible, and most died off. I'm glad they are growing again.
These rings are slightly raised above the surrounding area, to improve drainage. They dry out quickly, which is what I want this winter.
 I walk past this every day. I water it occasionally so that it won't dry out. The original rhizomes are growing a bit as well. The pine cones are an impromptu mulch additive. I collect them when walking the dogs and throw them around on the mulch. They add interest, and eventually break down like the rest of the bark chips. They dont seem to cause a problem to the irises.
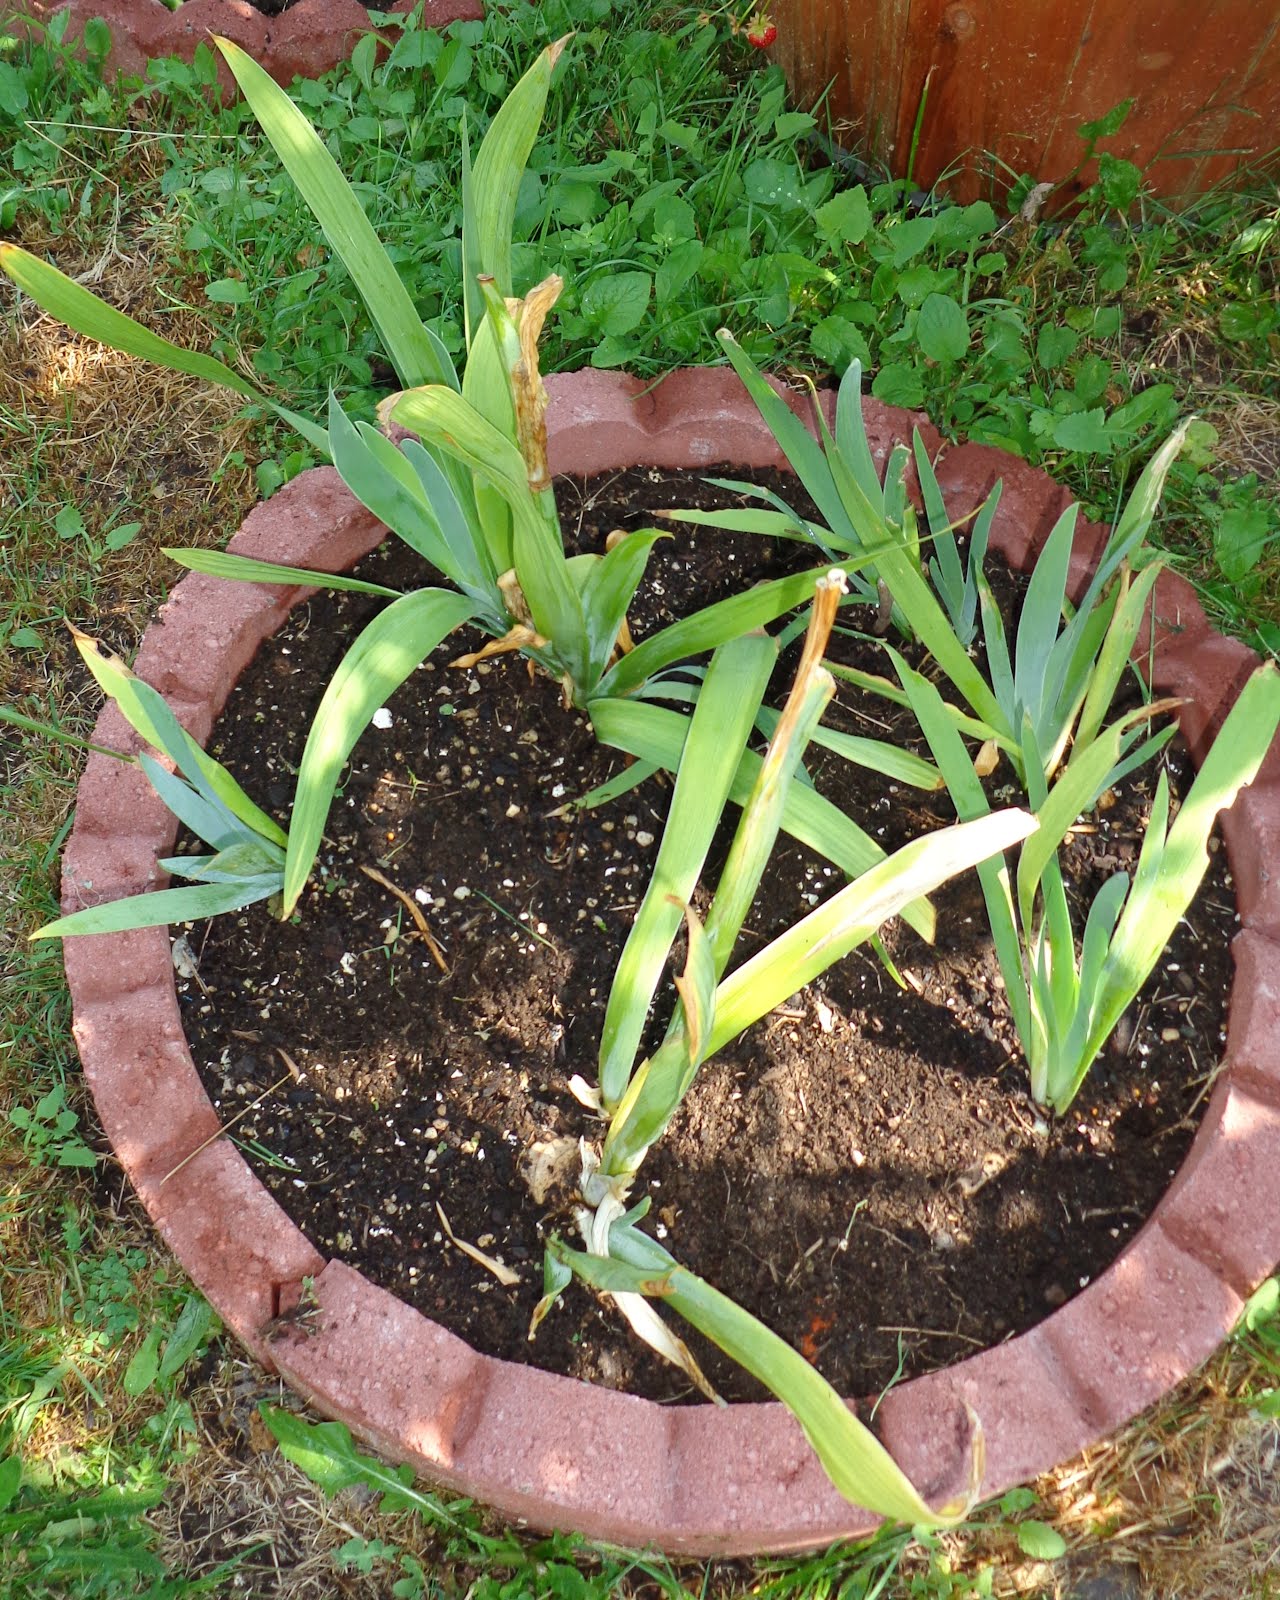
These rings are slightly raised above the surrounding area, to improve drainage. They dry out quickly, which is what I want this winter.
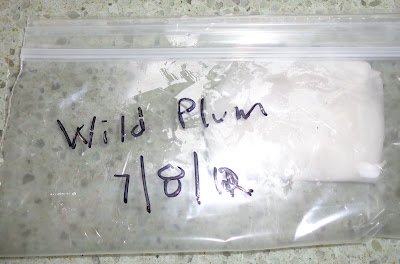
Sunday, July 08, 2012
Plums From Seed, part 2.
There are many conflicting versions regarding how to sprout wild plum, and other stone fruit seeds. I have a pretty good supply, from collecting plums. They have been washed and allowed to dry. Most are in an envelope after being allowed to dry overnight. Based on several you-tube videos, I chose 5 pits for removal of the hull. I used a vice grip so I could adjust the force, and because I don't have a nutcracker.
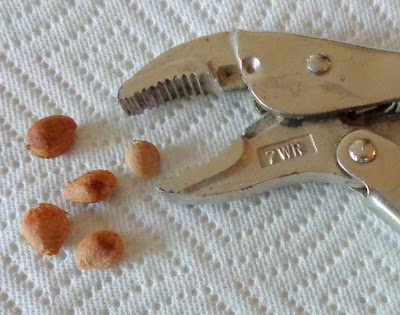 Vice grip and plum pits, dried overnight. These are wild plums. The pits are the size of a sweet cherry seed.
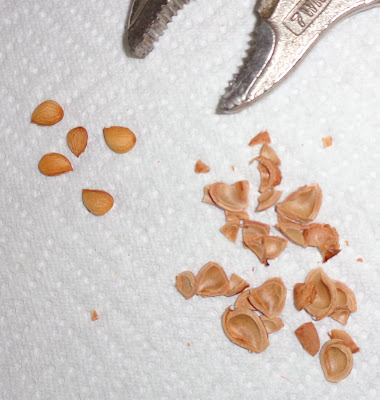 The first pit flew across the room. I used a little more finesse for the others. They cracked easily, releasing the inner kernel. Cool! They look undamaged.
 I moistened a paper towel, squeezed out the excess, wrapped the pits, placed them in a ziplock back, and placed them in the fridge. Now I need to wait one to 2 months. After that, I don't know - if they start growing, it's the wrong season (fall) to plant outside, but maybe they'll grow on the window sill.
I did a web search on coat removal and stratification and scarification. Coat removal would be a "complete" version of scarification. It appears that coat removal is beneficial for germinating seeds of fruits with pits, and many other seeds. In addition, stratification for peaches and plums, by refrigerating, shoulf last about 10 weeks. For example, from Iowa State Horticultural News, Cherry, Peach, and Plum (Prunus species)
Harvest fruit when full mature. Remove the seed. Seed may be sown in the fall or stratified seed may be planted in the spring. Stratify the seeds at 33 to 41 F. The sour cherry (Prunus cerasus) requires 90 to 150 days, the peach (Prunus persica) 98 to 105 days, and European plum (Prunus domestica) 90 days. Seed of plums and peaches should be planted 2 inches deep. Sow the seed of sour cherry at a depth of 1/2 inch.
I moistened a paper towel, squeezed out the excess, wrapped the pits, placed them in a ziplock back, and placed them in the fridge. Now I need to wait one to 2 months. After that, I don't know - if they start growing, it's the wrong season (fall) to plant outside, but maybe they'll grow on the window sill.
I did a web search on coat removal and stratification and scarification. Coat removal would be a "complete" version of scarification. It appears that coat removal is beneficial for germinating seeds of fruits with pits, and many other seeds. In addition, stratification for peaches and plums, by refrigerating, shoulf last about 10 weeks. For example, from Iowa State Horticultural News, Cherry, Peach, and Plum (Prunus species)
Harvest fruit when full mature. Remove the seed. Seed may be sown in the fall or stratified seed may be planted in the spring. Stratify the seeds at 33 to 41 F. The sour cherry (Prunus cerasus) requires 90 to 150 days, the peach (Prunus persica) 98 to 105 days, and European plum (Prunus domestica) 90 days. Seed of plums and peaches should be planted 2 inches deep. Sow the seed of sour cherry at a depth of 1/2 inch.


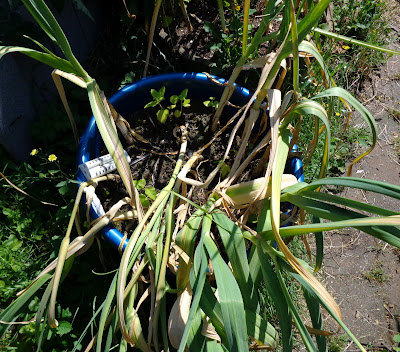
Garlic Harvest. Container gardening.
Garlic did very well in containers. Sine one container garlic was falling over and drying out, I pulled up about half. Here they are:
 I left in the still-firm plants, only pulling out the drier looking ones. This is Inchelium Red.
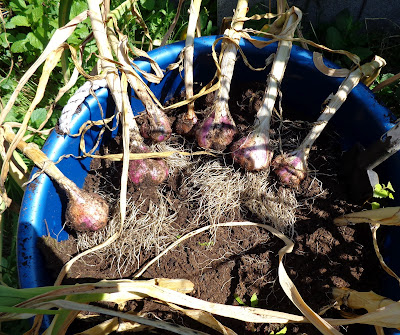 Interesting variation of size. I really don't think so many could be grown in this size space in the ground. This is half of the container's plants. This method works very well for me.
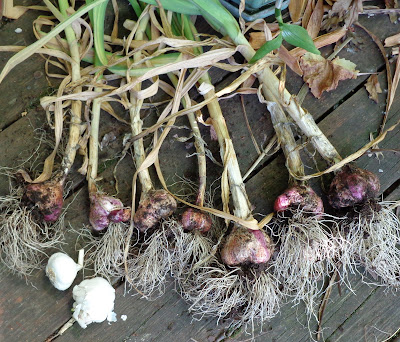 Two grocery store garlic heads, average size, are shown for comparison. I'm amazed at the size of these garlic heads. This may be variety and technique. I think they are larger than last year's crop. They've had successive generations to adapt to my conditions - I think I've been growing them about 8 years. I will leave these in the shade and out of rain to dry out for a week. It's in the 80s outside. I'm not putting them in the sun - one ear when I did that, they cooked. They will be stored in the cool dry basement in a single layer, in a cardboard box.


Saturday, July 07, 2012
Onions, Garlic in Containers. Allium harvest.
It's July in the Maritime Pacific Northwest, so onions, garlic, and other alliums are ripening off. The garlic and elephant garlic are not quit there, so I've left them in their containers. They won't get further water, however. Same for the container of Egyptian Walking Onions.
 This was my first experiment growing White Potato Onions (heritage multiplier onion) in containers. I didn't get all of the weeds pulled in late Spring, but they did well anyway. Pleased at the size and number of onions. Two weeks ago, I moved the containers out of the rain and sun, to the north side of the house, to dry off without baking. That's a good part about the containers. I was concerned about these last fall for 2 reasons. First, I planted them late, so I didn't know if they would get off to a good start. Second, I was concerned the plastic containers would either heat up too much, or freeze too much. They did fine.
 Here are the White Potato Onions, pulled up. This is one container of onions. I don't think you could have so many in an equivalent 2 foot diameter disk in the soil. I will leave them here to dry out. It's in the 80s today so they should dry in a week.
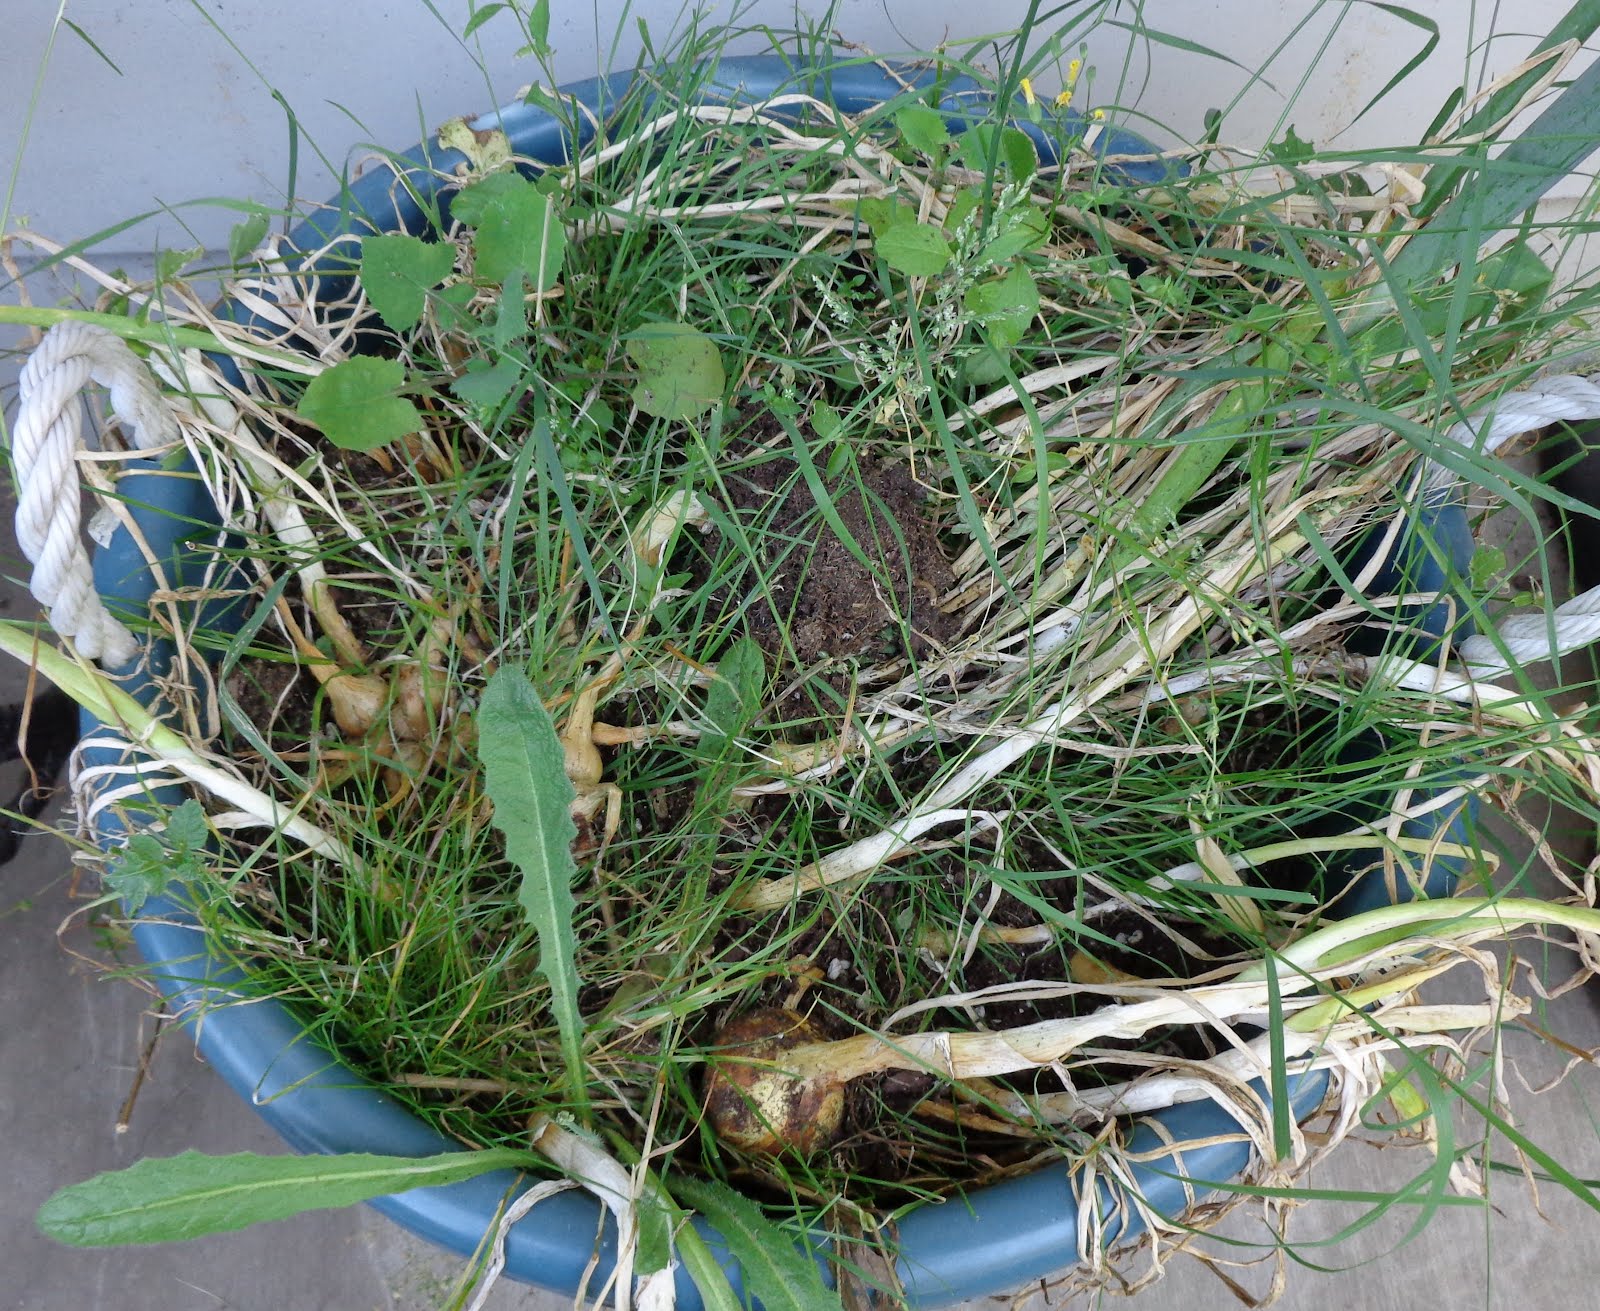
 One of the garlic containers.
This one is hardneck garlic. Hardneck garlic forms a scape - the flower head that creates tiny bulbils if allowed to mature. In early June, we removed the scapes and stir fried them - yummy flavor. Early removal of scapes is thought to increase the size and yield of the final garlic bulbs. The plants are starting to dry out. I hope it doesn't rain. These wooden containers are too heavy to move to a sheltered spot. Since this is the hardneck, it's the German White Porcelain garlic that I bought and planted last fall. I forgot to label them, but that's how I can tell the difference. Glad I sorted that out. Also it makes sense, because I planted the extra cloves of German White in with strawberries and peppers, and those also sent up scapes.
One of the garlic containers.
This one is hardneck garlic. Hardneck garlic forms a scape - the flower head that creates tiny bulbils if allowed to mature. In early June, we removed the scapes and stir fried them - yummy flavor. Early removal of scapes is thought to increase the size and yield of the final garlic bulbs. The plants are starting to dry out. I hope it doesn't rain. These wooden containers are too heavy to move to a sheltered spot. Since this is the hardneck, it's the German White Porcelain garlic that I bought and planted last fall. I forgot to label them, but that's how I can tell the difference. Glad I sorted that out. Also it makes sense, because I planted the extra cloves of German White in with strawberries and peppers, and those also sent up scapes.
 This one is the softneck garlic. Softneck garlic does not have a scape. Inchelium Red garlic, which is what I started with a few years ago, is softneck. So now I have identified the varieties.
 These Allium gigantium were in an inconvenient location. The flower stalks were completely brown, dry, and crispy, so OK to dig up. These started as one bulb about 2 years ago, so pretty good yield here, 5 bulbs. They'll get stored in the garage in paper bags, when dried off, and be replanted in the fall. They are the size of a medium onion. I don't know if they are edible, and not all that interested in finding out. However, they area an onion and garlic relative, and are ripening at the same time as the onions, so I included them here.
 This Egyptian Walking Onion was mixed in with the White Potato Onions. I could tell because of the "head" of onions that it produced. It's not quite ready to harvest, but I did anyway. I want to see if it will dry off like the other onions, for storage.


Subscribe to:
Posts (Atom)