It's July in the Maritime Pacific Northwest, so onions, garlic, and other alliums are ripening off. The garlic and elephant garlic are not quit there, so I've left them in their containers. They won't get further water, however. Same for the container of Egyptian Walking Onions.
This was my first experiment growing
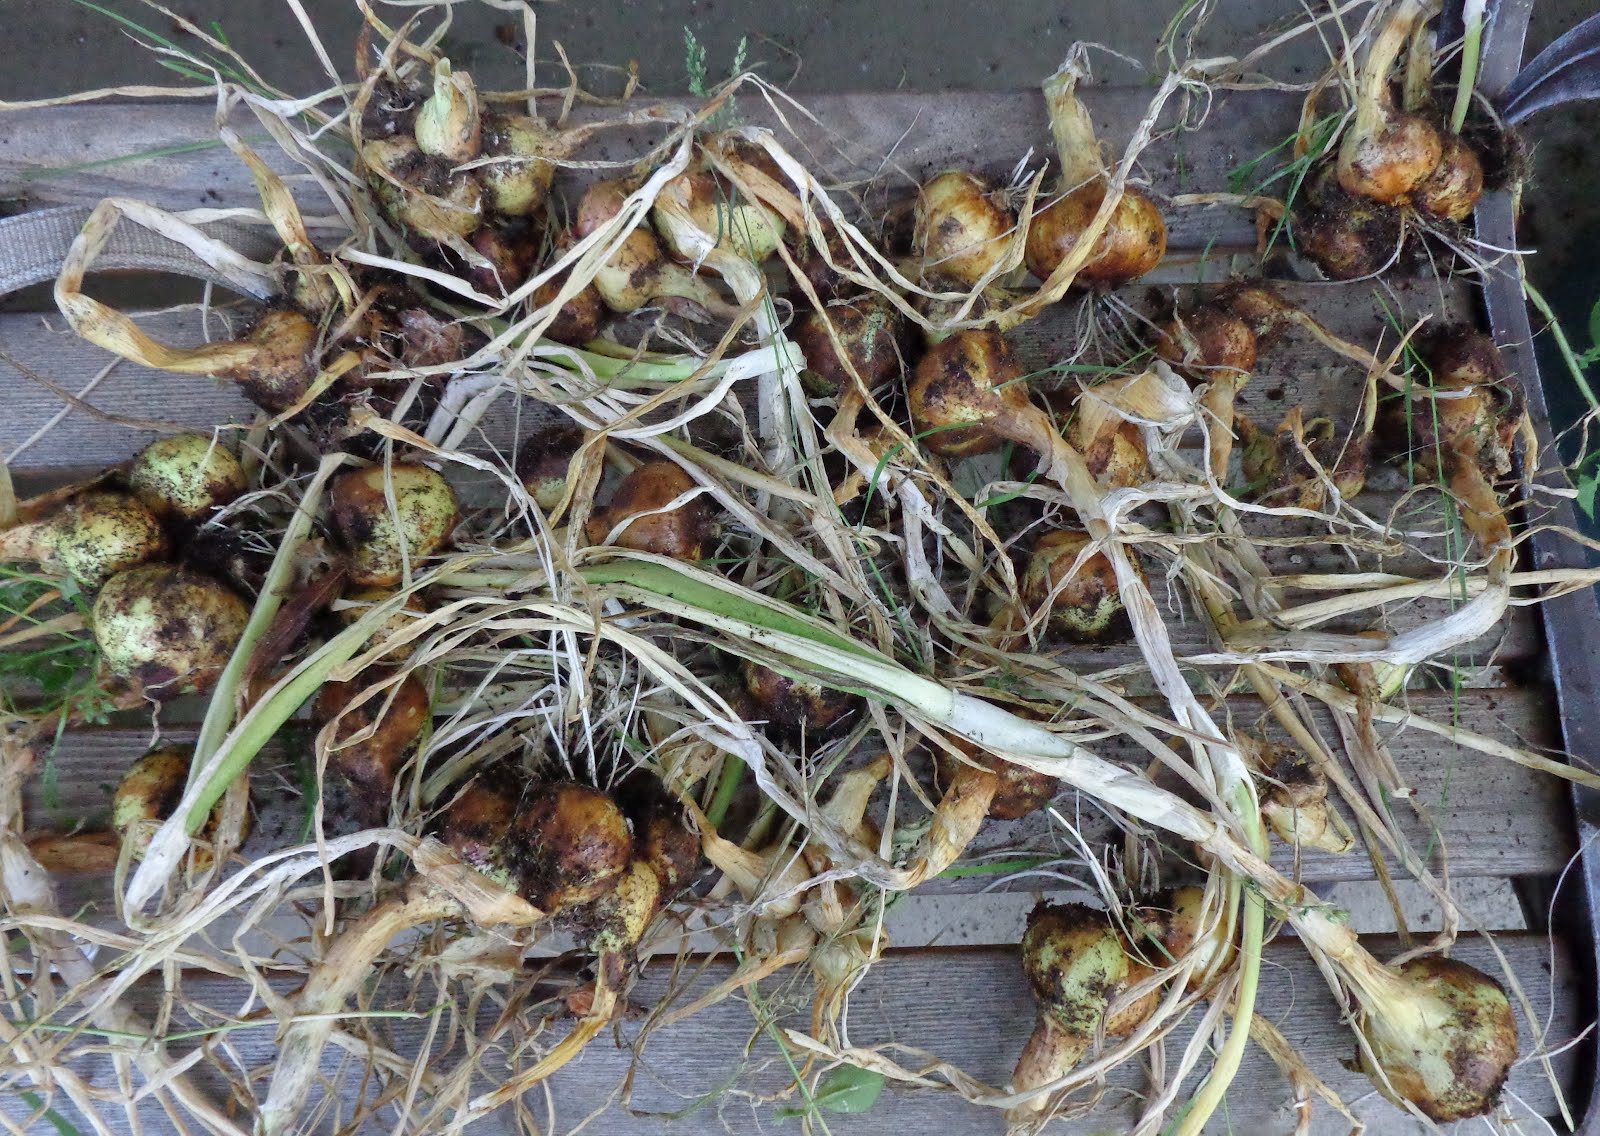
White Potato Onions (heritage multiplier onion) in containers. I didn't get all of the weeds pulled in late Spring, but they did well anyway. Pleased at the size and number of onions. Two weeks ago, I moved the containers out of the rain and sun, to the north side of the house, to dry off without baking. That's a good part about the containers. I was concerned about these last fall for 2 reasons. First, I planted them late, so I didn't know if they would get off to a good start. Second, I was concerned the plastic containers would either heat up too much, or freeze too much. They did fine.
Here are the
White Potato Onions, pulled up. This is one container of onions. I don't think you could have so many in an equivalent 2 foot diameter disk in the soil. I will leave them here to dry out. It's in the 80s today so they should dry in a week.
One of the garlic containers.
This one is
hardneck garlic. Hardneck garlic forms a scape - the flower head that creates tiny bulbils if allowed to mature. In early June, we removed the scapes and stir fried them - yummy flavor. Early removal of scapes is thought to increase the size and yield of the final garlic bulbs. The plants are starting to dry out. I hope it doesn't rain. These wooden containers are too heavy to move to a sheltered spot. Since this is the hardneck, it's the
German White Porcelain garlic that I bought and planted last fall. I forgot to label them, but that's how I can tell the difference. Glad I sorted that out. Also it makes sense, because I planted the extra cloves of German White in with strawberries and peppers, and those also sent up scapes.
This one is the softneck garlic. Softneck garlic does not have a scape.
Inchelium Red garlic, which is what I started with a few years ago, is softneck. So now I have identified the varieties.
These
Allium gigantium were in an inconvenient location. The flower stalks were completely brown, dry, and crispy, so OK to dig up. These started as one bulb about 2 years ago, so pretty good yield here, 5 bulbs. They'll get stored in the garage in paper bags, when dried off, and be replanted in the fall. They are the size of a medium onion. I don't know if they are edible, and not all that interested in finding out. However, they area an onion and garlic relative, and are ripening at the same time as the onions, so I included them here.
This
Egyptian Walking Onion was mixed in with the White Potato Onions. I could tell because of the "head" of onions that it produced. It's not quite ready to harvest, but I did anyway. I want to see if it will dry off like the other onions, for storage.


 View from the driveway and side street, looking Southeast. I don't see that there's been an attempt at gardening, beyond a few shrubs and trees. The blooming tree is a red buckeye.
 It's mostly grass. Lots of room to start a small orchard and garden plots.
 This camera ket changing the color settings. The grass is not really fluorescent. Looking up at the house. The blackberries on the right aren't hurting anything, and if we get to them will provide some juicy berries next month.
 Looking down from the house. Lots of room for gardening, as noted earlier.
 Here is that neglected iris. From the shape, it appears to be an old variety. Newer ones are more ruffled. I plan to move it, divide, and also bring many more to a dedicated iris bed or two. Or 3, or more. Something where I can control weeds and let the irises really shine.
 I walk past this every day. I water it occasionally so that it won't dry out. The original rhizomes are growing a bit as well. The pine cones are an impromptu mulch additive. I collect them when walking the dogs and throw them around on the mulch. They add interest, and eventually break down like the rest of the bark chips. They dont seem to cause a problem to the irises.