This year I decided to try growing potatoes in a container. Potatoes seem like a cheap, readily available commodity, so it may seem like a waste to grow some in a container. I was prompted by several thoughts.
First, I read that they grow very well in containers, providing a high yield in a small space. 2nd, I can grow varieties that are not easily found in the store.
3rd, based on my prior experience, fresh, home grown new potatoes taste very good - another item that seems better than store bought.
These are a white potato, the seed potatoes are labeled simply "Gourmet White". I grew a few 2 years ago, they were very good, but growing in the ground we missed most of them until they resprouted again. I also bought some organic "Russian fingerling" and will try those.
The method is:
1. Start with a container with about 1 ft of potting mix on the bottom. Lay in the sets. I haven't learned whether it's better to cut the sets into individual eyes, or plant the entire set. Both have been advised. Cornell advises cutting larger ones, and planting smaller ones whole. I decided to plant the entire set, reasoning that ther emay be less risk of rot. With multiple eyes, they may be more crowded, but in a container that may not matter. In addition, Cornell advises: "If you want fast emergence, keep the bag of cut potatoes at room temperature until sprouts appear. Some varieties are slow to break dormancy and benefit from a 2- to 4-week “pre-warming” before planting. Others sprout in just a few days. Plant about 2 to 4 weeks before your last frost date. The soil temperature should be at least 40 F. Do not plant where you've grown potatoes, tomatoes, peppers or eggplant in the past 2 years." It's so warm outside, I'm taking the chance and planting out side.
2. You can presprout the potatoes or grow in the soil. I'm not sure which is better. The gourmet white were already sprouting in the store, so it's decided. The Russian Fingerling are not sprouted, but if truly organic would not be treated with chemicals to prevent sprouting. I planted them directly. I also have a few in a windowsill to see if they sprout.
3. The potato sets are laid in the potting soil and covered with a few inches of potting soil. When the plants reach about 6 inches tall, a few more inches of potting soil are added, covering the lower leaves of the plants. This process is repeated until the soil is near the the top of the container, and can be further mounded.
4. According to containergardening.com, you can dig around in the soil with your hands,and pull off potatoes that seem big enough to eat, and each plant should produce about 2 to 4 pounds of potatoes. That's not bad for a container.
Some gardeners use containers that grow as the potatoes grow, or juse plastic garbage pails. I opted for a container that grew a Brugmansia last year, but had left outside so froze and died.
I may plant some sets in the garden as well. I have some left over.
Vegetablegardening.com suggests growing them in a cardboard box or bushel basket. This container was about the size of a bushel basket, maybe a bit larger. Some growers even grow them in a bag of potting soil.
A grower with a nice accent growing potatoes in compost bags:
Thursday, March 18, 2010
Thursday, March 11, 2010
Tomato and pepper seedlings
Last weekend (Sunday) I planted most of the varieties of peppers and tomatoes. There will be a few more to plant this coming weekend. They are in little pudding cups with holes drilled in the bottoms. I did use the seed starting mat - many sprouted in 2 days. That's impressive! So far, just tomatoes. The peppers are cayenne peppers that were in the seed starting experiment. I changed them over to regular potting soil. With their slow rate of growth, the early start may be needed. To the right is another of the orchid backbulb experiments, growing a tiny sprout. For the time being, it's under the light as well.
I dug out the old fluorescent light fixture and set it up in the window for the seedlings. That way, they get actual (but meager) sunlight, and much more supplemental light. This worked well in the past.
Container gardens
The wine barrel container gardens are growing nicely. I do think they got a head start due to coveirng with plastic. Now I'm leaving them uncovered, except for some chicken wire to discourage birds.
Everything has sprouted, with the exception of the old chinese celery and the onion seeds. Maybe they just need a little more time. The seeds that have sprouted and are growing actively are spinach, chinese radish, radish, brassica mesclun, lettuces, and cilantro. I don't know if they will give edibles in the claimed 20 to 30 days, since it's chilly. Still, very encouraging.
What's blooming?
Daffodils
These have grown undisturbed for 8 years.
Quince
Forsythia. This is the forsythia that I grew from a discarded stick, picked up while walking the dogs. Turned out nice. The location is shaded, NOrth of the house, but it is coming into its own.
Closeup of Sunny Delight peach.
Sunny Delight peach
Chinese Mormon Apricot.
Hollywood plum. this is the second year of growth - I wonder if the blossoms will set?
Honeybabe Peach
Trilite peach.
None of the peach trees appear harmed at all by the plastic wrapping method. I haven't sprayed a second time. I have a 6 inch tall peach seedling, slearly offspring from one of the genetic dwarf peaches, that has been growing for 2 years. It has not been treated wtih leaf curl prevention, and it does have leaf curl. So far, the other peach trees appear free of the disease. It is too early to say for certain.
Other developments:
The wild cherry seeds that I planted last summer are grown into 2 inch tall plants. I removed 3 to flower pots. The long term goal is super-pruning them like the other trees, in the style of "Backyard Orchard Culture". Can it be done? I don't know. Everything is a gamble.
The pear buds have opened into clusters of flower buds, but the flowers themselves are not yet open.
Last sunday I also went around with a little paintbrush, taking pollen from flower to flower among the peaches, then between the twp apricot trees, then between the plum trees. The Shiro plum has just 4 flowers, so who knows if it will fruit. The Hollywood plum is said to be self fruitful, and has many more flowers. It would be cool to have a crop of plums, second year after planting the tree. The peaches are also said to be self fruitful, but playing the bee shouldn't hurt anything. A few apricot flowers fell off while I was pollinating. That may mean it't too late to make a difference. We'll see.
Saturday, February 27, 2010
Here is the rest of the Apple Pie
I've been informed that I did not publish the rest of the apple pie, as I said I would 2 weeks ago:-) here it is.
Crust recipe here.
This was a 9 inch apple pie.
I used 4 large Braeburn apples. I sliced 5, but that was too much, so I ate the 5th.
Filling is:
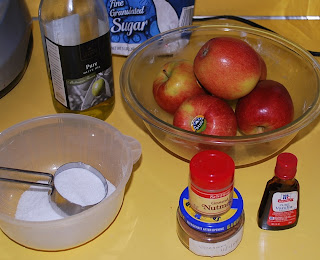
3/4 cup sugar (I used 2/3 cup, not as sweet)
1/4 cup flour
1/4 tsp nutmeg
1/2 tsp cinnamon
dash of salt
6 cups thinly sliced baking apples (Braeburn is good, or Jonathan, or MacIntosh.
2 tbsp olive oil (Recipe calls for butter. I don't miss it, olive oil is healthier).
1 tsp vanilla.
I added the vanilla to the sugar, mixed them together, then ran the mixture through a sieve to make it granular again. I like having vanilla in the apple pie.
I layered the apples into the crust, a layer of apples, then a layer of flour mix, then a layer of apples, then a layer of flour mix, then one more layer. Then dribble the olive oil on top of the mix. Some bakers mix the apples and flour mix, then pour it into the crust. I think either is OK.
Covered with top crust, a few holes punched with a fork. My mother had a special "pie ventilator" device that cut little designs into the top. I've never been able to find one. Even though a fork does the job just fine, using the device would be more nostalgic. I guess I'll have to settle for using her maple rolling pin.
Foil to keep the edges from burning. I find this works better than the aluminum guard that I bought. The foil gives better coverage. It can be reused multiple times, and I do.
I bake 425 X 15 min then turn the oven down to 375 for 40 minutes. The recipe calls for 425 the entire time, but in my oven that's too much.
The recipe came from my mother's cousin, Pearl's Betty Crocker cookbook, 1969, but I made enough changes that maybe it's my own. I decreased the sugar as noted, added the Vanilla, and decreased the nutmeg because the higher amount in the original recipe gave me heartburn. I might eliminate it altogether. I also changed the butter to olive oil, as noted, and used the olive oil crust.
Today I actually made a rhubarb pie - no photos today, but photos and recipe are here (page down, also not in correct order) except that I used the olive oil crust and forgot the oil (butter). We'll see if that makes a difference. With oil in the crust, it may not. I also left out the lemon juice - forgot to buy some. I also found an error in the recipe - didn't say how much rhubarb - so I corrected it. Wow! Home grown Rhubarb pie and it's not even March yet! It was redder than last time, probably due to the young stems.
Looking at the older photos, the sauce in the pie looks watery. That's because it was sliced when hot. It gels when cool. We like eating ours cool anyway, the flavors seem to blend together better.
Some bakers use tapioca starch in pies. I keep forgetting to buy some. Tapioca starch apparently makes a better gel in the pie filling.
Subscribe to:
Posts (Atom)