Friday, March 29, 2024

Stars Quilt, Beginning. 29 Mar 24.

 Im putting together a quilt kit for a repeat of this quilt.  The original pattern and instructions were by Lynne Goldsworthy in a supplement of Today's Quilter Magazine a few years ago.  Mine strayed quite bit from the published instructions, and so will this one will even more.  Lynne called this quilt "Pythagorus Theorem" because of the triangle calculations.

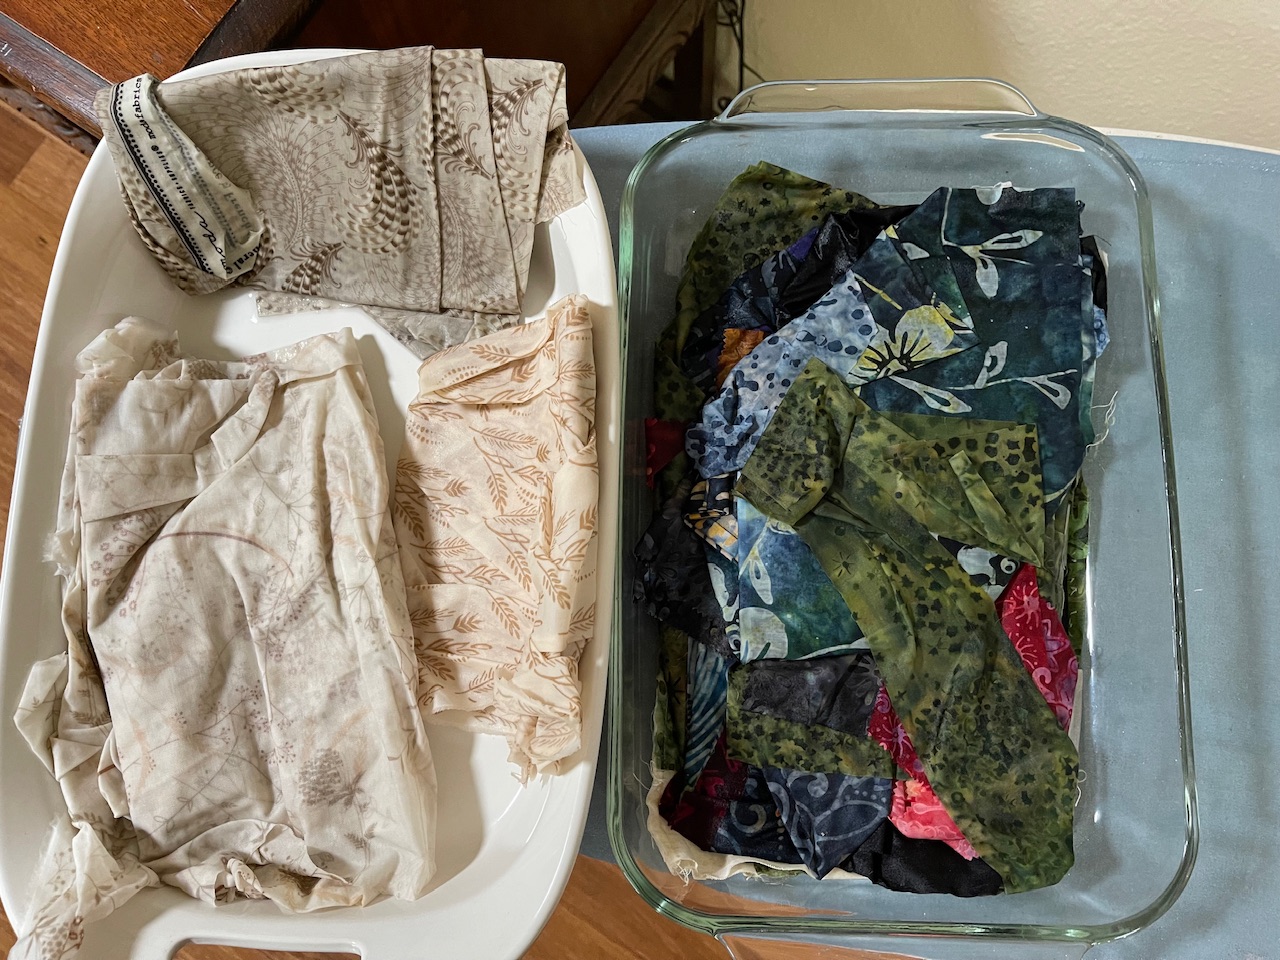
One challenge is that the instructions make use of fat quarters and newly bought fabric.  I am using what I have. Some is new, some is yardage, some scraps, some left over from jelly roll sets.

This instructions called for 72 diamonds, 2 1/2 inches wide.  I added more, so now it's 88 (I think).  Coincidentally, the first quilt book that I bought, years ago, had a diamond template exactly that size.  That made it go quickly.  Also, jelly roll fabric is 2 1/2 inches wide.


Jelly Roll Strip With Diamond Template.  Perfect size!


This pattern calls for 288 half square triangles.  I'm not certain if the exact size is in the instructions.  They are 2 1/2 inches square when trimmed.  I looked several times.   But there is a lot of text, so who knows?   Probably there.   The instruction calls for starting with larger pieces than I have, but I can adapt.

One way I can stream line a bit is to start with two six (6) inch squares.  Lay facing each other, draw lines corner to corner.  Then sew 1/4 inch both sides of each line. Small template is 2.5 inches which is what I want in the end  Here I should have put the line on the seam instead of the line.  These are scrap fabric.  It took me several tries to figure this out.


Then, cut so there are four three-inch squares, then cut on the lines to make eight triangles.


Open up, press seams open, and there are 8 half-square triangles.  They need a slight trimming, but not much.  It's less sewing, cutting, measuring, than individual half square triangles.  I misaligned some but these are scrap anyway.


I have a lot of 2 1/2 inch strips that will become half square triangles too.  Those need individual measuring, cutting, and sewing.

Especially for triangles and stars - which is this entire quilt - a lot happens on the bias.  Which means things can be more stretchy, distort easily, be uneven, and not match up.  Starching stiffens the fabric and stabilizes it.   I use starch concentrate.  It's cheaper and soaks into the fabric thoroughly, giving a nice stiffness.  I use the dilution for medium or medium-heavy.  I soak the fabric in the starch solution, then lay it out and press down to remove excess liquid.  I don't wring or squeeze.


Casserole pans work nicely.  Then I lay it out on towels to dry in a warm place.  It takes about a day.  I steam iron to flatten the fabric.  I'm not pre-washing,  That doesn't work for strips.  They unravel.  Plus, I want the final quilt to shrink a little when finally washed, for a textured, crinkly, sort of antique-y look.

Pruning Fig Trees. 29 March 24.

 I started pruning the fig trees, south of the house.  

These are my main-producing and favorite fig varieties.  I'm cutting about half of the top portions back to 5 or 6 feet.  That is to keep them within reach.  Depending on the variety, those are fall crop (main crop).

The other growth is left in place, or just the growth tip cut.  Those are for summer (breba ) crop.  Again, depending on variety.

Of course, I remove crossing branches, center congestion, branches in the way or dead.


Trimming Trachycarpus Palms. 29 Mar 24.

 These are the two Trachycarpus palms.  I don't like taking off too many leaves.  I removed the bottom leaves to facilitate mowing, using a riding mower.


One winter (roughly 2014 maybe?) a hard freeze killed most of the growing point of the tree on the right.  I thought it was dead, so planted the other.   Sometimes life finds a way.  A new growing point emerged.  Crooked and one-sides at first.  Then it grew back to normal.

All it takes is a little breeze, and the fronds quiver and dance.  Same idea as quaking aspen, but these remind me of egrets dancing.

Cleft Grafting Apple Espalier Trees. 29 Mar 24.

 These are two of the Redlove that I trained as Espaliers.  They have healthy, mature root systems and trunks.  So far in my garden, the apples have deep red flesh as promoted, but are hard, lemon-sour, and inedible.

My space is limited, and I'm not getting any younger.  I decided to replace the Redlove tiers with proven varieties that I love, Jonagold and Akane.

Since these are going onto low tiers, I think they need to be vigorous varieties, which is true for both selections.  With mature rootstocks and vigorous varieties, maybe I'll see fruit in three years.

I'm serious about safety.  I think whip-and-tongue makes a sturdy, beautiful graft.  When well done, there is little or no wood exposure to the elements.  It's always been my go- to method.  My success rate approaches 100%.  But.  There is a lot of cutting and maneuvering, and the cut can give way to injury easily.

So this time, I chose cleft grafting.  All of the scion work can be (was) done on a cutting board, with blade facing down (wearing mandolin gloves).


The tree work can be done with blade facing away from the worker and his hands.  In addition, it's only one cut, and it faces the tree.


Assembling the graft is not quite so elegant.  Apples take grafts easily, and cleft grafting has been used for eons, so I think they will take.


By the way, here is the whip-and-tongue graft, same tree and variety, that I gave a blood sacrifice last year.


Fully healed.  I had never unwrapped it, so the growth was restricted.  Now it is free to grow.  It did heal fine.  In another  year or two, growth will make the graft invisible.

The tree now.  I  cut about 90% of the spur and new growth from the branches. I will let a few apples form, but I want most nutrients to go to those grafts to push growth.  The top tier is Blue Pearmain, which I'm keeping.


The completed work.  The new grafts are circled in yellow.  For the challenged gardener, all of the grafting and a lot of the pruning were done sitting on the gardening bench.  The espalier can be as short as convenient for accessible gardening.

Re-Potting Miniature Rose (Sunmaid Kordana?). 29 Mar 24.

The replacement glazed pots came.  I selected the most well branched, vigorous looking from the yellow miniature roses, and up potted it.

Here's the result.


They are all growing very nicely.   I wanted one that I can bring indoors.  I might plant three pf the others together in a larger pot, and the fifth in the garden.

My theory is that the group makes a nice, sort of living bouquet to sell, with lots of flowers on short plants.  They get intense, wavelength - specific LED designed to keep the internodes short, specially formulated fertilizer and hormones.

At home, they need home growing conditions.  More room, completely different soil, pruning etc.  They might grow a bit taller, with longer internodes.  I'm just theorizing there.  Ad the plant matures, I think it could be bushier (with good pruning too) and more floriferous.

When wind catches those tall containers I planted them in, sometimes they fall over.  This one is heavier and not top heavy

Not root bound at all.


When I potted these a month or so ago, no roots reached the bottom.  I think they're quite healthy looking.

I did searches on all of the rose varieties on the original container. Two were not found. The only yellow one was KORpot055.  A little searching on that came up with Sunmaid Kordana.  I think the images confirm that.  I'm surmising, this is not Sunmaid Floribunda or Sunmaid Grande.

It doesn't matter.  I'm not going to propagate or sell.  It's just nicer to say "Sunmaid Kordana" than "that yellow minuature rose that i bought at Fred Meyer" or "KORpot055"