Tuesday, November 30, 2021

Planting Third & Last Apple Tree Hybrid, Calypso™ x Golden Sentinel™ 11.30.2021

This was the last of the three seedlings from the Calypso™ x Golden Sentinel™ cross that I grew out this spring. It is the least promising of the three - leaves are green, although petioles are red. The tree had more vigor and more widely separated internodes, so I strongly suspect not columnar. The branchlets are long and spiky, not short and stubby, so I suspect they are branches, not spurs, so I suspect not columnar. There is also no red color to the roots, another indication that the appkes will either not have red flesh, or not much of that. Still, it's hard to throw away a tree I grew from seed, without giving it a chance to prove itself. So I planted it in a sheltered (fenced) although not ideal spot. Here it can grow and not be in the way or too much work, and maybe we'll see what it can do in a couple of years. This was the most vigorous of the three. It also had the heaviest root mass. Not root bound but headed there. I bare rooted it using the garden hose as usual.
Planted, watered in, and the start of vole collar added. I need to get out there with tin snips and wire or zip ties to do the rest.

Monday, November 29, 2021

Stratifying Apple Seeds, Cross of Redlove™ Era™ X Urban Apple™ Blushing Delight.™ 11.29.2021

This Spring, I protected some flowers of Redlove™ Era™ and Urban Apple™ Blushing Delight™. I pollinated the Era™ with pollen from the Blushing Delight™. Actually, the Urban Apple™ was mislabled, the one I bought was Tasty Red™ but the apple is clearly Blushing Delight™. One ripe apple resulted from that cross. I kept it in the garage for 2 months and just got around to cutting it today. The long keeping didn't hurt it a bit. I think the flavor is better. Still pretty tart, almost lemony with berry flavor.
To make typing easier, I'll call the first "RLE" and the second one "BD". I think it could be a good choice, because RLE has such deep red internal and external color, and BD is considered disease resistant, is columnar, and has nice large, sweet apples. I placed them in moist paper towel, then into a zipper plastic bag and into the fridge. A four month stratification would mean I can plant them about April 1. It's interesting, one apple had so many seeds. I expected five. The goal, as before, is a columnar tree with red flesh apples. I will use leaf color to help with selection - I think red leaves on an apple indicate red flesh although some red flesh apples do have green leaves.

Planting Young Apple Tree Hybrid, Calypso™ x Golden Sentinel. 11.29.21

I wanted to get the apple seedlings into the ground. These are the hybrids I made by crossing the red flesh, red leaf,pink flowered "RedLove™ Calypso™ with the columnar, yellow skin Golden Sentinel™. My hope is a red flesh, red leaf apple tree with columnar growth habit. Golden Sentinel™ has some great flavored, nice size sweet apples as ancestors. Of the three seedlings that resulted, two were red leaf, so probably red flesh if they make apples. Also, the internodes seem close together, which might suggest columnar form, I don't know but I think maybe. Also, there are tiny branches that look like fruiting spurs - a bit much to hope for the first year, but you never know. That also suggests to me possible columnar form. The third had red leaf petioles but green leaves, more vigor, and the little branches are longer, so it probably wont be as red flesh if at all, and probably not columnar. Anyway, I planted the other, shorter red leaf seedling in the garden a while ago, and today planted the shorter one.
I'm impressed by the nice root mass. Not root bound, not winding around, but a lot of stong thick roots. I hosed them off to bare root the tree as much as I could. I don't have a great spot for it in my garden, but as long as it's columnar, the spot where I planted it us OK. Plus it can be moved if needed.
Now it's in the ground, so any freezing shouldn't hurt. Plus, it has a chance to grow more roots with first Spring flush of growth, into the earth. Watering will be much easier, less frequent, than in containers. I may be able to extend irrigation to this one next, even better. One more apple seedling to go.

Fig Tree Starts. 11.29.2021

My Hardy Chicago fig tree here in Battle Ground was destroyed by voles. Voles are cute looking little mouse-like creatures with cute looking little perky ears, that are really Satanic demons They chew through tender trees at the base, killing them. They also sometimes gnaw at potatoes underground. Yes, voles are pure evil. In this case, the tree fell over. I thought if I propped it up, it might survive. But no, it's now a dead stick. The parent tree, source of the start for this one, is still thriving in Vancouver. It needs a major pruning. It also had three big, six foor tall shoots growing out of the base. Yesterday I tried to remove those shoots, thinking if I can get one with roots, that's a head start at replacing my dead Hardy Chicago fig tree. It's a good, solid, hardworking and hardy tree, and makes a good reliable fig crop every year. Reminds me of me. Back to the shoots, this was the best I could do. I could not get the others with roots. If I was smart, I would have air layered them, say, starting last March. Then I would already have nice size, well rooted Hardy Chicago fig trees. We wont go there. Anyway, it's not much root for such a long stick.
That's a lot of tree with just some puny little roots. I planted it anyway. I might cut it bit shorter, I don't know. It has a long Winter and Spring to grow new roots, and if fig trees are good at anything, it's growing roots. Well, and making figs, too, but that'll be a year two ahead. I once stuck a plum stick that big into the ground as a garden stake, and it grew very nicely. In case that start doesn't survive, I cut some nice sticks to root as hardwood cuttings. Some times, those will root if you just shove them into good soil and leave them pretty much alone. Just water if they need it. If they don't grow, at least they are there as row markers. So I did that.
With one exception, I grew all of my fig trees from cuttings, and more than that to give away. It's been a while since I did that. I usually started them midwinter, not this early. I could store the sticks in the fridge for the winter, but there's no room. So, I'll see if I can start them now. I cut the sticks short enough to fit into plastic bags. I washed them with soapy water. Then I scored each with a razor blade, making an incision through the cambium layer which is where cells are regenerated and serves as stem cells for making baby roots. Then I treated each one with Dip'n'Grow rooting hormone. Then wrapped in wet paper towel, placed into the zipper plastic bag, and put them on a seed starting warming mat. Possibly (probably?) the incision and rooting hormone are not necessary, and I have done it without a warming mat, but I have it so why not? Might help.
So that's my fig tree starting experiment for this year. We will see if any of these methods work, or all of them. If there are extra fig trees started, that's fine. I can always find them a new home.

Raised Bed #4 Is Put To Bed For the Winter. 11.29.2021

Raised Beds #1 and #2 are the two biggest and new ones, already all done for the winter. Raised Bed #3 was the onion bed in 2021, then cleaned up and planted with garlic back in Sept and Oct. This is Raised Bed #4. It was mostly peppers, but also lettuce, radishes and odds and ends that got messy. Today I cleaned it up, got rid of the weeds, loosened the soil a little. At one end, I replanted shallots and some potato onions that I had stuck into there among the other plants. The shallot was grown last winter from a grocery store shallot, and made four jumbo bulbs I separated and replanted them. The potato onions are much smaller and I'm growing them out of curiosity. The other end of the bed is two rows of garlic. Except for the garlic end, I added a layer of tree leaves, then seven big buckets of the new top soil, then a thicker layer of tree leaves on top. The additional top soil makes up for this year's settling.
So this bed is ready for the winter. So now there is just one bed to get ready. It needs some parts from the hardware store, so it will take a while. There is no rush, it won't be planted until May or June. However, I want to give ut a chance to settle and cure, so my self imposed deadline is mid Dec. Meanwhile, I have completel cleared the bed and contents to ground level. So that's a start.

Wednesday, November 24, 2021

Raised Bed #2 Is Completed. 11.24.2021

Well, this one is done. On top of the purchased top soil, I added a layer of leaves, then a layer of compost. Not a lot, but maybe enough to provide some humus and inoculum for the leaves. It will get more mixed up when it's time to plant. Then I finished emptying out the former garlic-then-bush beans raised bed that needs rehab, transferring that soil to the new bed. One nice thing, there were lots of earthworms in that soil. Of note - none of the green bean plants had rhizobium nodules. So, when I plant the late winter legume, they will need an inoculum. Anyway, then I added the soil from that former garlic / green bean bed, added a little horticultural lime, mixed it up, and smoothed it a bit. It was notable, how much easier it was to work a bed at this height. Very nice! I think the soil was not crumbly enough. It will get lots more leaf mulch and compost to help with that. It grew great crops thus year, however, so may be perfectly fine as is.
Then I gave it a blanket of Mapke leaves. They are already becoming moldy, so maybe most will break down by Spring.
The bed that will be taken apart, put back together but with a better mole barrier (I hope). There is no rest for the wicked.
I'll disassemble this the rest of the way, then probably add two layers of fencing, then reassemble the bed with wire stays for the rebars that hold the planks in place. It will take some effort, but not even 25% of the work I did on those cement block beds. After that, the final raised bed just needs cleanup, and the pathways need some thought and a bit of work. One bed already got cleaned up when I planted garlic in Sept or Oct. I have all winter long to do that. Just for my first thoughts, I like the size and height of these new beds very much. It's a good thing. I intend never again to do such a labor intensive project. Time to make the best of what I have already made.

Monday, November 22, 2021

Tree Leaves and More Tree Leaves.

This sounds like work but isn't bad. Plus it will save a lot of labor, plastic, and garden food. Here are where the second and third truckloads of leaves went - Half of the bed where I raised sweet corn this year, will be squash next year -
Most of the bed, where I raised squash this year, to be sweet corn next year and some former lawn to expand that bed a bit.
Here, the thick layer of leaves will kill all of the weeds and grass, and prevent them from growing next Spring until I work the soil to plant those crops. The lower layers of leaves will decompose and add humus, and make it easier to work, more fertile, and absorb / release water better. Any leaves that remain when I want the garden beds, will be mulch. I could hire someone to rototill instead, in the Spring, for weed management, but that doesn't improve tilth. I could buy compost, but the leaves are free. Also people need to get rid of their leaves, so it's win/win. I could lay down black plastic to kill weeds, and will in some areas. But the leaves work just as well and have those benefits. I do this every year. Collecting and using tree leaves have improved the soil so much - fertility, earthworm populations, moisture managenent, tilth.

Raised Bed Project, Continued. 11.22.21

Here is the second raised bed so far. I leveled the ground, placed wire fencing and plastic mesh on the ground to frustrate moles, built the sides, and filled most of the way, 2/3 full with the new top soil.
I waited to build the end wall, so that I could haul in most of the soil using a shefl barrow. Then I built the end and finished the first 2/3 layer of topsoil.
Then I added a few inches layer of leaves to build up organic matter a bit during the winter.
Next I'll add some compost, then top the bed with enriched soil from the bed where I raised garlic, then green beans, this year. Then top it off with leaves and add the occassional mushroom or earthworm as I find them. This is too much work. I'm glad the worst is over, although those last layers are still needed and then rehab / rebuild the bed that moles destroyed. That onechas plank sides, and isn't as tall, so maybe not as much hard labor.

Friday, November 19, 2021

Holiday Cactus (Schlumbergera) Blooming. 11.19.2021

Some of these started blooming a few weeks ago, others just started. I repotted these last winter. They are about three years old, maybe four.
This one is much older. Maybe ten or fifteen years.
These are cuttings Im took last winter from the older red one and a salmon colord one that is not blooming yet. They may need another year to start blooming.

Saturday, November 13, 2021

Raised Bed Progress. 11.13.2021

Today I topped off the first raised bed with a layer of tree leaves. During the winter, earthworms should pull some of those underground and start their composting. I thought about buying a soil inoculum, since the topsoil was processed by the recycler and probably devoid of much life. Instead, I've added my own compost, and added a top layer of soil from my existing garden bed. That should give it life. Also, I collected mushrooms of various sorts and added those on top of the soil, prior to the leaf layer. To an organic gardener, soil is a living community of microorganisms. Whenever I happen to see an earthworm, usually a result of digging, I re-home them in the new raised bed. Earthworms are nature's tiny farmers. They tunnel through the soil, aerating it. Their mucous binds soil particles together. Their castings make minerals available to plant roots. They till organic matter from leaves and roots, into the soil. Meanwhile, the other raised bed is about 20% built now. Not bad. Rain is expected tomorrow.

A Very Good Pumpkin Pie. 11.13.2021

This was one of my best pumpkin pies ever. I used puree from Galeux d'Eysines pumpkin. It's basically the Libby's pumpkin recipe, except I used light coconut milk for baking, instead of evaporated milk. I also rolled sesame seeds onto the crust before transferring it to the pie plate. I blind baked the crust, leaving the aluminum foil on the crimped edges throughout baking. Definitely grow Galeux d'Eysines pumpkins next year.

Winter Cover Crop. 11.13.2021

I have not tried this mix before. I've grown buckwheat as a cover crop. Deer love it. This seed covered 1/2 of the area where I want to plant sweet corn next year, and where I grew squashes this year. I don't know if this is too late, or how they will do, or if deer will eat all of the plants, or if they will be too weedy. It's an experiment. I don't want to leave the soil bare, or encourage thistles, so it is worth a try. Today was a break in rain. It should rain again over the next several days. That should get them settled in and starting.
Here is the seed mix: Austrian Winter Peas Winter Wheat Triticale Forage Collards Hairy Vetch Daikon Radish Fenugreek Crimson Clover Berseem Clover Yellow Mustard

Persimmons. 11.23.2021

Birds have started eating the ripest persimmons, so I picked them all. Persimmons ripen just fine indoors. Most of these are "Nikita's Gift". There were also more "Saijo" than I expected.

Wednesday, November 10, 2021

New Raised Bed #1 is Done. 11.10.2021

This one is completely done. I topped it off with some well aged compost, then a layer of good raised bed soil from the one I'm digging out. I also planted a few dozen topsets from Egyptian Walking Onions at the ends. Still thinking about whether to plant a cover crop on the rest, or just a thick layer of leaves.
I cut the wire fencing and plastic fencing to use as mole deterrents for the bottom of new raised bed #2, and moved some blocks nearby. When these, and the rebuilt smaller bed with wooden sides are done, I really don't want to do more big garden construction projects after this. The entire idea is to reduce heavy work. Meanwhile,the hardest part is to level the soil for the blocks, and lay the blocks kevel and plumb. After the base rows are in place, it goes better. Maybe ten more days? Also thinking about pathways between raised beds. This year, moles did a lot of damage, undermining sides and corners of beds and burying the woodchips with soil. Plus, I got behind pulling perennial volunteers - mainly four o'clocks and potatoes - and it became a challenge to access those garden beds. I'm thinking laying down wire fencing in the walkways, top with black plastic, then I don't know. Wood chips? Gravel? Depends on how I think moles will affect this area.

Saving Pickle Cucumber Seeds. Part 2. 11.10.2021

This is after they fernented for four days. I rinsed the seeds in a strainer. Now they are drying on a piece of newspaper.
I also have a back-up packet of open pollinated, bush type pickle cucumber seeds. Just in case these don't do well. This was SO easy, I can't see ever needing to buy pickle cucumber seeds again.

Monday, November 08, 2021

Raised Bed Update. 11.8.2021

 Here is the first of the new raised beds, so far.  Today I spread a thin dusting of lime on the previous fill of soil, which is about nine inches from the final surface level.  Also compost and some leaves.  I wont be able to mix the contents, so it's sort of a "lasagna" soil building.  Then I added another approx four inches of soil from the raised bed that I have to tear out due to mole damage and falling over.  A dusting of ashes, then will add the final topsoil layer, also from that bed.  There are lots of earthworms so I know they will be tunneling through and mixing it up nicely.

In his book about Gardening West of the Cascades, Steve Solomon recommends building soil via a cover crop of garden peas. Their roots grow deeply, and the plants enrich the soil. Garden peas can be planted very early. My current though is, around late February or early March, plant the raised beds with peas. If they grow quickly and we get a harvest, great. Otherwise, at tomato planting time in late May I can pull them out and feed the plants to the chickens. The idea is to get the soil building benefit, more than the peas.

Makem and Clancy, Inch By Inch, Row by Row.

 I don't know if this will embed.  It's "The Garden Song", recorded here in 1988 by Irish folk singers in their final stage appearance.  John Denver and Pete Seeger also recorded versions, and it was on the muppets.

I think it's a lovely song and performance.  It speaks to my gardening peacefulness.  It's too bad our society got into fakeness, unfathomable greed and selfishness over the past decade.  Not that it wasn't like that in places and times before, but holy moly, what happened to our souls? By that, I'm not referring to someone's idea of what idea of what idea of their chosen gods and which tribe they supposedly adhere to, supposedly justifies their thoughtless grievances and narcissism, but rather our inner kindness as human beings.  How will we find that again as a people, and be inclusive and kind and honest about it to boot?

Anyway there's still that patch of soil out there, a truckload of leaves to spread and the next raised bed to build block by block, inch by inch, row by row.  Tomorrow more "rain will come tumblin down" according to the prediction.

I hope this plays.  I can't just post the lyrics, which I guess have a copyright, so it's a Youtube embed instead.  This is via BBC late late show in Jan, 1988.

Here is David Mallett's version.  He wrote the song in 1975.


Friday, November 05, 2021

Saving Pickle Cucumber Seeds. 11.9.2019

 This summer I let the last few pickle cucumbers reach full size and mature, for seeds.  Those were grown from seeds I saved last year.  The cucumber should be very ripe.  This one was kept in a garage window to complete ripening.

Cucumbers are "wet seeds".  They need to be fermented 2 or 3 days, then rinsed and dried.


Saving Seeds. 11.5.2021

 For dry seeds - seeds that naturally have a dry seed head, such as onions, cilantro, marigolds - I collect the seed flower heads and save them in a brown paper lunch bag.  I let them dry a couple of months.  Then I reach into the bag, crush them with my hand, and remove the big dry stems.  I place them on a plate, and for seeds with light chaff, I take them outside, swirl them around and blow away the chaff.  Some need to have the flower petals hand picked off - marigolds.

I processed most of the dry seed heads today.

Lettuce, black seeded Simpson.

Sweet basil. I grew these plants from saved seeds from last year.

Lettuce Leaf Basil. Open pollinated so the shape might not be true but the flavor should still be very good.
Cilantro. The seeds are actually coriander, which is nice in chili.
A pink four o'clock. I also have mixed seeds and a yellow four o'clock from last year.
I also processed marigold seeds. 

 Last winter, I bought a grocery store shallot and planted it. It bloomed, so I collected the seeds. It's probably a hybrid, so maybe not a great idea but might grow some anyway.
All of these went into envelopes made from mailings or paper bags.

Wednesday, November 03, 2021

Trying to Start Some Peach Seeds. 11.3.2021

These seeds are from my best peach tree. I grew that tree from seeds I collected from an Oregon Curl Free peach tree. That was pretty free of the dreaded Peach Leaf Curl, but succombed a year later from a terminal case of leaf canker. If it's not one thing, it's another. Meanwhile, this seedling tree grew like gangbusters. I didn't know what to do with it, so I planted it in the chicken yard. For the past two years, that was my best peach crop ever. Especially this year. Nice size, juicy, peach-tasting peaches, and a lot of them. They can very nicely and make great peach pies. No leaf curl at all, and no canker either. I wonder if the rootstock was an issue with the canker. I don't know. Anyway, so far the offspring is canker free. I tried grafting some scion from this tree onto purchased rootstock. Didn't take. I'm not good at grafting peaches. Here's my thought.

 (1). Generally speaking, most peaches are self pollinating and seed grown peach trees are usually similar to their parent. Not always, but often.

 (2). Maybe it's better to have peaches on their own roots anyway. No grafting complications, rootstock borne disease, nursery-borne diseases. 

 (3). My experiences so far are that seed grown peach trees start bearing as fast as grafted peach trees. 

 (4). I think in general, peach trees often die young. 

 So if you have a peach trees that's been bearing well for a number of years, this might be a good time to start a new one. All that said, I collected pits from my "special" home grown peach tree. I planted a bunch of them in a row at the mend of the garlic bed, where if they start growing next Spring, I'll see them. 

 I also cleaned up a dozen peach pits, wrapped in wet newspaper, and placed into a jar. That went into the fridge. Now is about four months, so I took half of them, cracked them open (hammer on concrete garage floor), and washed off the seeds. Those are going into damp paper towel, in a zip lock bag, in my office. I plan to do the same with the others after another month of stratification.
Originally, I designated this peach "Cowlitz" in honor of the people who preceeded us in this area. However, I thought that might be improper, so I renamed it "Sunny Day Peach". As far as ai can find, there is no other fruit with that name. 

 I just looked up peach trees on the Raintree website. $59.99 plus who knows what shipping! And my experience, most (almost all) don't do that great, if they survive at all, in my garden. A free peach pit from a reliable, well producing tree, is a real bargain! 

 Edit 11.3.01 I only had these in my office for a few hours. Further reading, it looks like peach pits need roughly 90 to 110 days to germinate. We are still a week or two from that date. Some people remove the seed from the pit prior to stratifying. So I think we should be OK.

Soil For New Raised Beds. 11.3.2021

I decided to have the soil hauled here instead of doing it myself. I calculated the beds will need three cubic yards each, and Ning also wants a cubic yard. My little pickup, trusty as it is, can only handle 1/3 cubic yard at a time. On a good day - for dry soil mix or wood chips. That would have been about 28 trips. This project is a signifant part of my gardening future, so it's worth it. This soil is recycled from whatever is brought to the yard waste center, mainly sod or yard re-grading. I used recycled topsoil from the same source, last year, for one of the raised beds, amended with home made compost. That was an excellent crop (garlic). Various places sell mixes - sand, compost, perlite, forest humus (that one sounds suspicious). All of the organic fluff will break down in a year or two, resulting in a lot of volume loss. The sand or perlite might help drainage, but I think will dry out too fast. Topsoil is what the garden is anyway, so I bought plain, sifted topsoil. I'm surprised he could back that giant truck through the gate. But he did.
In a sense, that truck was full of next year's tomatoes :-). First, I need to fill the raised bed. The top foot will be fresh compost plus enriched soil,from a raised bed that I have to deconstruct and rebuild due to mole damage. I think the first bed will be completed and ready for winter's mellowing and settling, in about a week.

Tuesday, November 02, 2021

Green Jalapeño Hot Sauce. 11.2.2021

I fermented some green Jalapeño peppers and made hot sauce, so the end of season crop wouldnt go to waste. This has the flavor we expect from Jalapeños, more "green" and not fruity like the red ripend ones. The texture is a little more crunchy, compared to the red. Still, quite tasty. Other than using green peppers instead of red, it's the same recipe - the peppers, garlic, onion, brine, and a bit of life starter from a jar of uncooked sauerkraut.

Garlic Crop for 2022. 12.2.2021

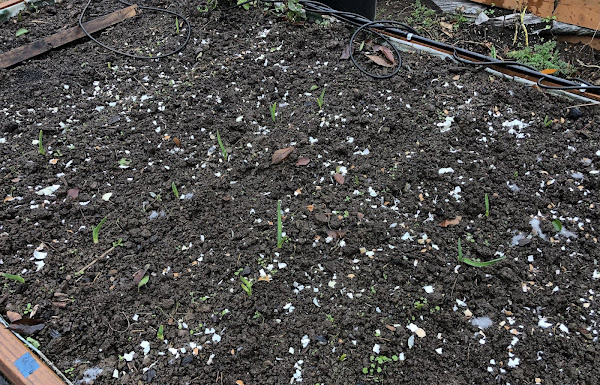
Most of the garlic that I planted last month is growing. There is a row of holdouts, and a few here and there, plus I did add one more row when I cleared out a row of marigolds last week. This is the variety "Music" which I grow year after year, maintaining my own starts. They got a big scattering of coffee grounds and eggshells. Now that they are up, I can cultivate between rows.
These are starts from last year's bulbs grown from top bulbils. I'm glad they are growing. They were a bit behind the others, so I need to cultivate some more. These are in the ground, so I have to get onto my knees to weed them.
The Lorz Italian Softneck garlic isn't up yet. Maybe it's a type that won't emerge until Spring. I don't know, we will see :-)